
Spare shooting doesn’t get the attention that strike balls do, but it’s where most league bowlers leave the most pins on the table. You can carry a 180 average with a mediocre strike percentage if your spare game is tight. On the flip side, you can struggle to break 170 while striking well if corner pins keep beating you.
The good news is that spares are the easiest part of bowling to practice.
Strikes depend on entry angle, pin carry, and how the oil pattern changes throughout the night. Those are factors you can’t fully control.
Spares come down to lining up correctly and making a repeatable shot.
The spare shooting tips in this guide will give you a framework for how to pick up the 10 pin, improve your 7 pin conversion rate, and handle everything in between.
Why a Solid Spare Game is the Key to Higher Scores
Here’s the math that changed how many bowlers think about their game. Every converted spare adds roughly 11 pins compared to an open frame. Miss three makeable single pins in a night, and you’ve given away over 30 pins before counting the bonus you would have earned on subsequent shots.
Spare shooting rewards consistency over athleticism, which makes it one of the fastest areas to improve. A bowler who commits to a system and practices it deliberately can see real results within a few weeks.
Building that consistency starts with one fundamental change to how you release the ball.
The Golden Rule: Flatten Your Wrist and Take Out the Hook
Your strike ball is designed to hook. That curve into the pocket creates maximum pin action. But the hook works against you on spare shots because too many variables affect how much the ball curves. The oil pattern matters. So do the dry boards near the gutters. And the lane changes as the night goes on.
The solution is simple. Throw a straighter ball. By flattening your wrist at release, you take most of the curve out of your shot. Instead of cupping your hand under the ball and rotating through, which creates a hook, you want an end-over-end roll that travels in a straight line.
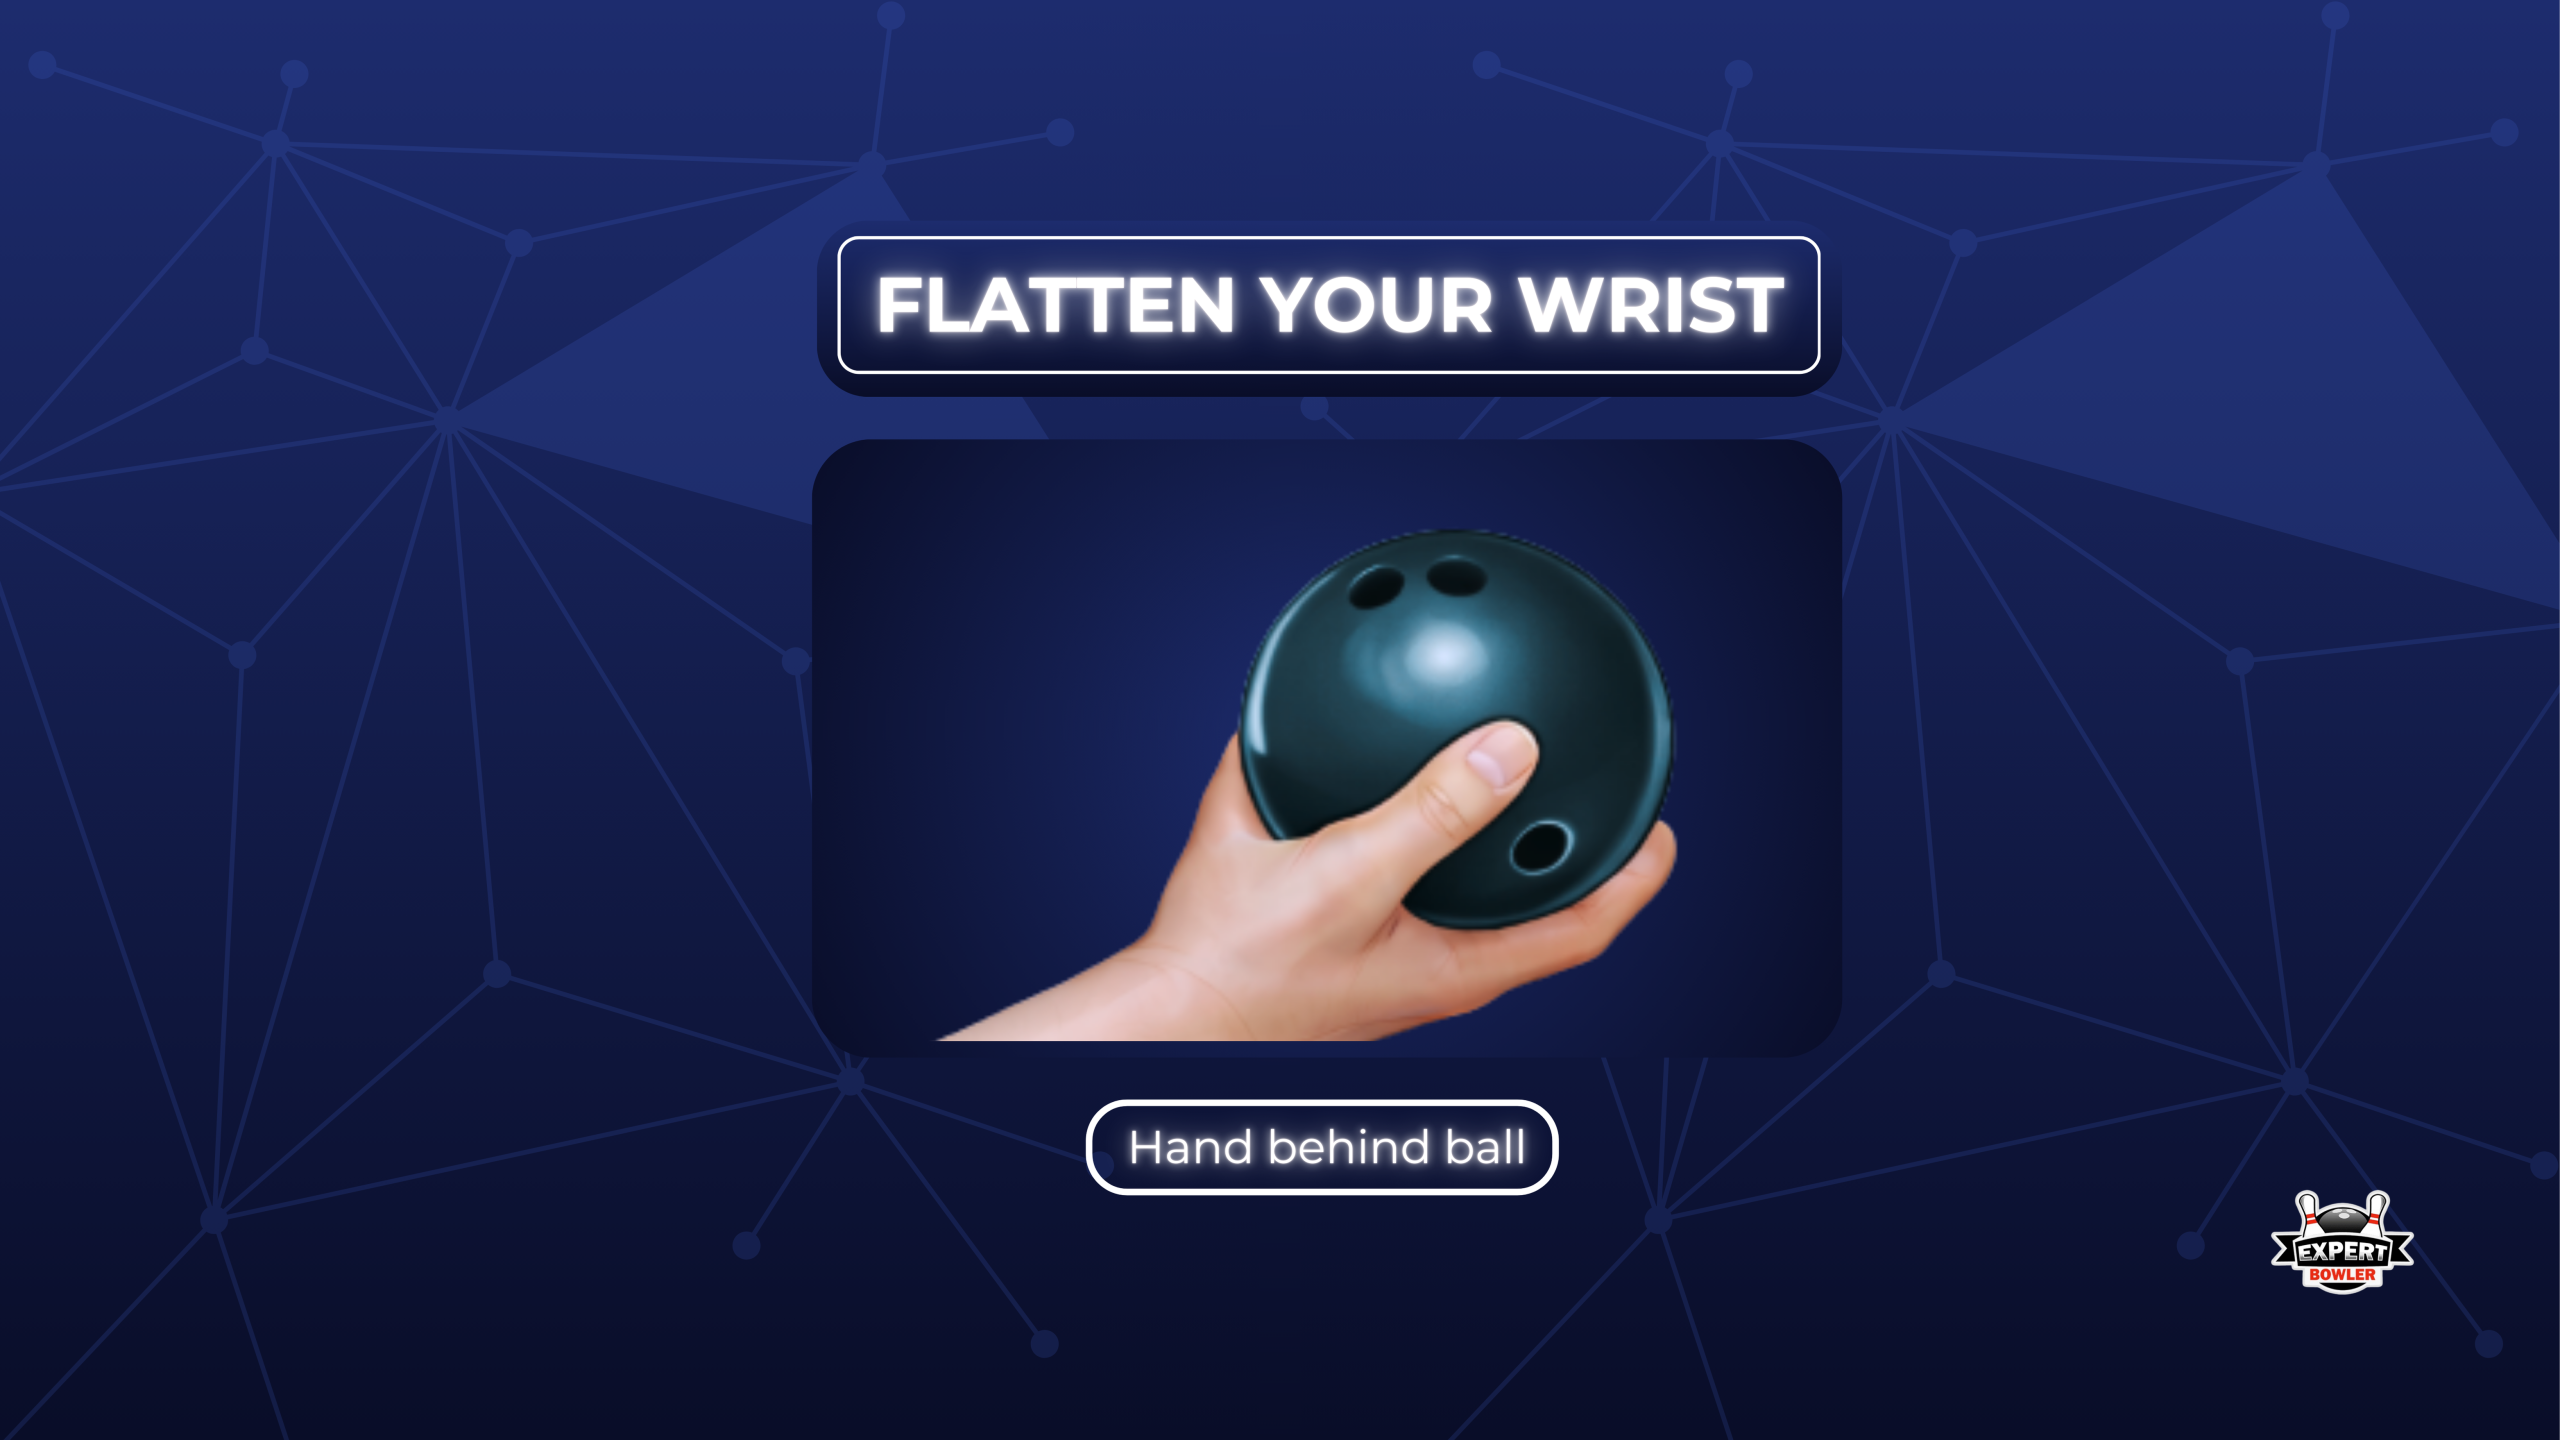
During your setup, uncup your wrist so your hand sits behind the ball rather than underneath it. Position your thumb near the 12 o’clock position on the ball. At release, let your palm face the ceiling rather than rotating around the side of the ball.
This technique feels unnatural at first because it contradicts your strike release. Stick with it. Once you’re not fighting the ball curve on every spare attempt, your conversion rate will climb. For a deeper look at how wrist position affects ball motion, check out our guide on how to spin a bowling ball.
How to Conquer the Dreaded 10-Pin
The 10-pin is one of the most common single-pin leaves for right-handed bowlers, and it’s frustrating because everything about your natural game works against you.
Your hook curves left, which takes the ball away from the pin. The dry boards on the right side pull the ball further left. And the gutter sits inches from your target, creating mental pressure that leads to steering.
The solution isn’t fighting these factors. It’s using geometry to make them irrelevant. Learning how to shoot corner pins effectively starts with maximizing your angle across the lane.
The “Stand Left, Throw Right” Strategy
When you stand on the far left side of the approach and throw cross-lane, you create a wider margin for error. A ball that misses slightly left still catches the pin. A ball that misses slightly right has several boards of cushion before the gutter.
Here’s how to set up and execute this shot:
- Position your sliding foot around board 35, counting from the right gutter. This puts you near the left edge of the approach.
- Square your entire body to face the 10-pin with your shoulders, hips, and feet all pointing at the target rather than down the lane.
- Walk straight toward the foul line and resist the natural pull to drift back toward center.
- Use the flat wrist release to eliminate the hook and send the ball on a straight path to the pin.
Why does this work? A diagonal line from board 35 to the 10-pin crosses more lane surface than a straight shot from near the center. That extra distance means small errors in your aim have less impact on where the ball ends up.

Finding Your Mark on the Lane
Once your feet are set, you need a target to aim at. These steps will help you dial in your line and troubleshoot when things go wrong:
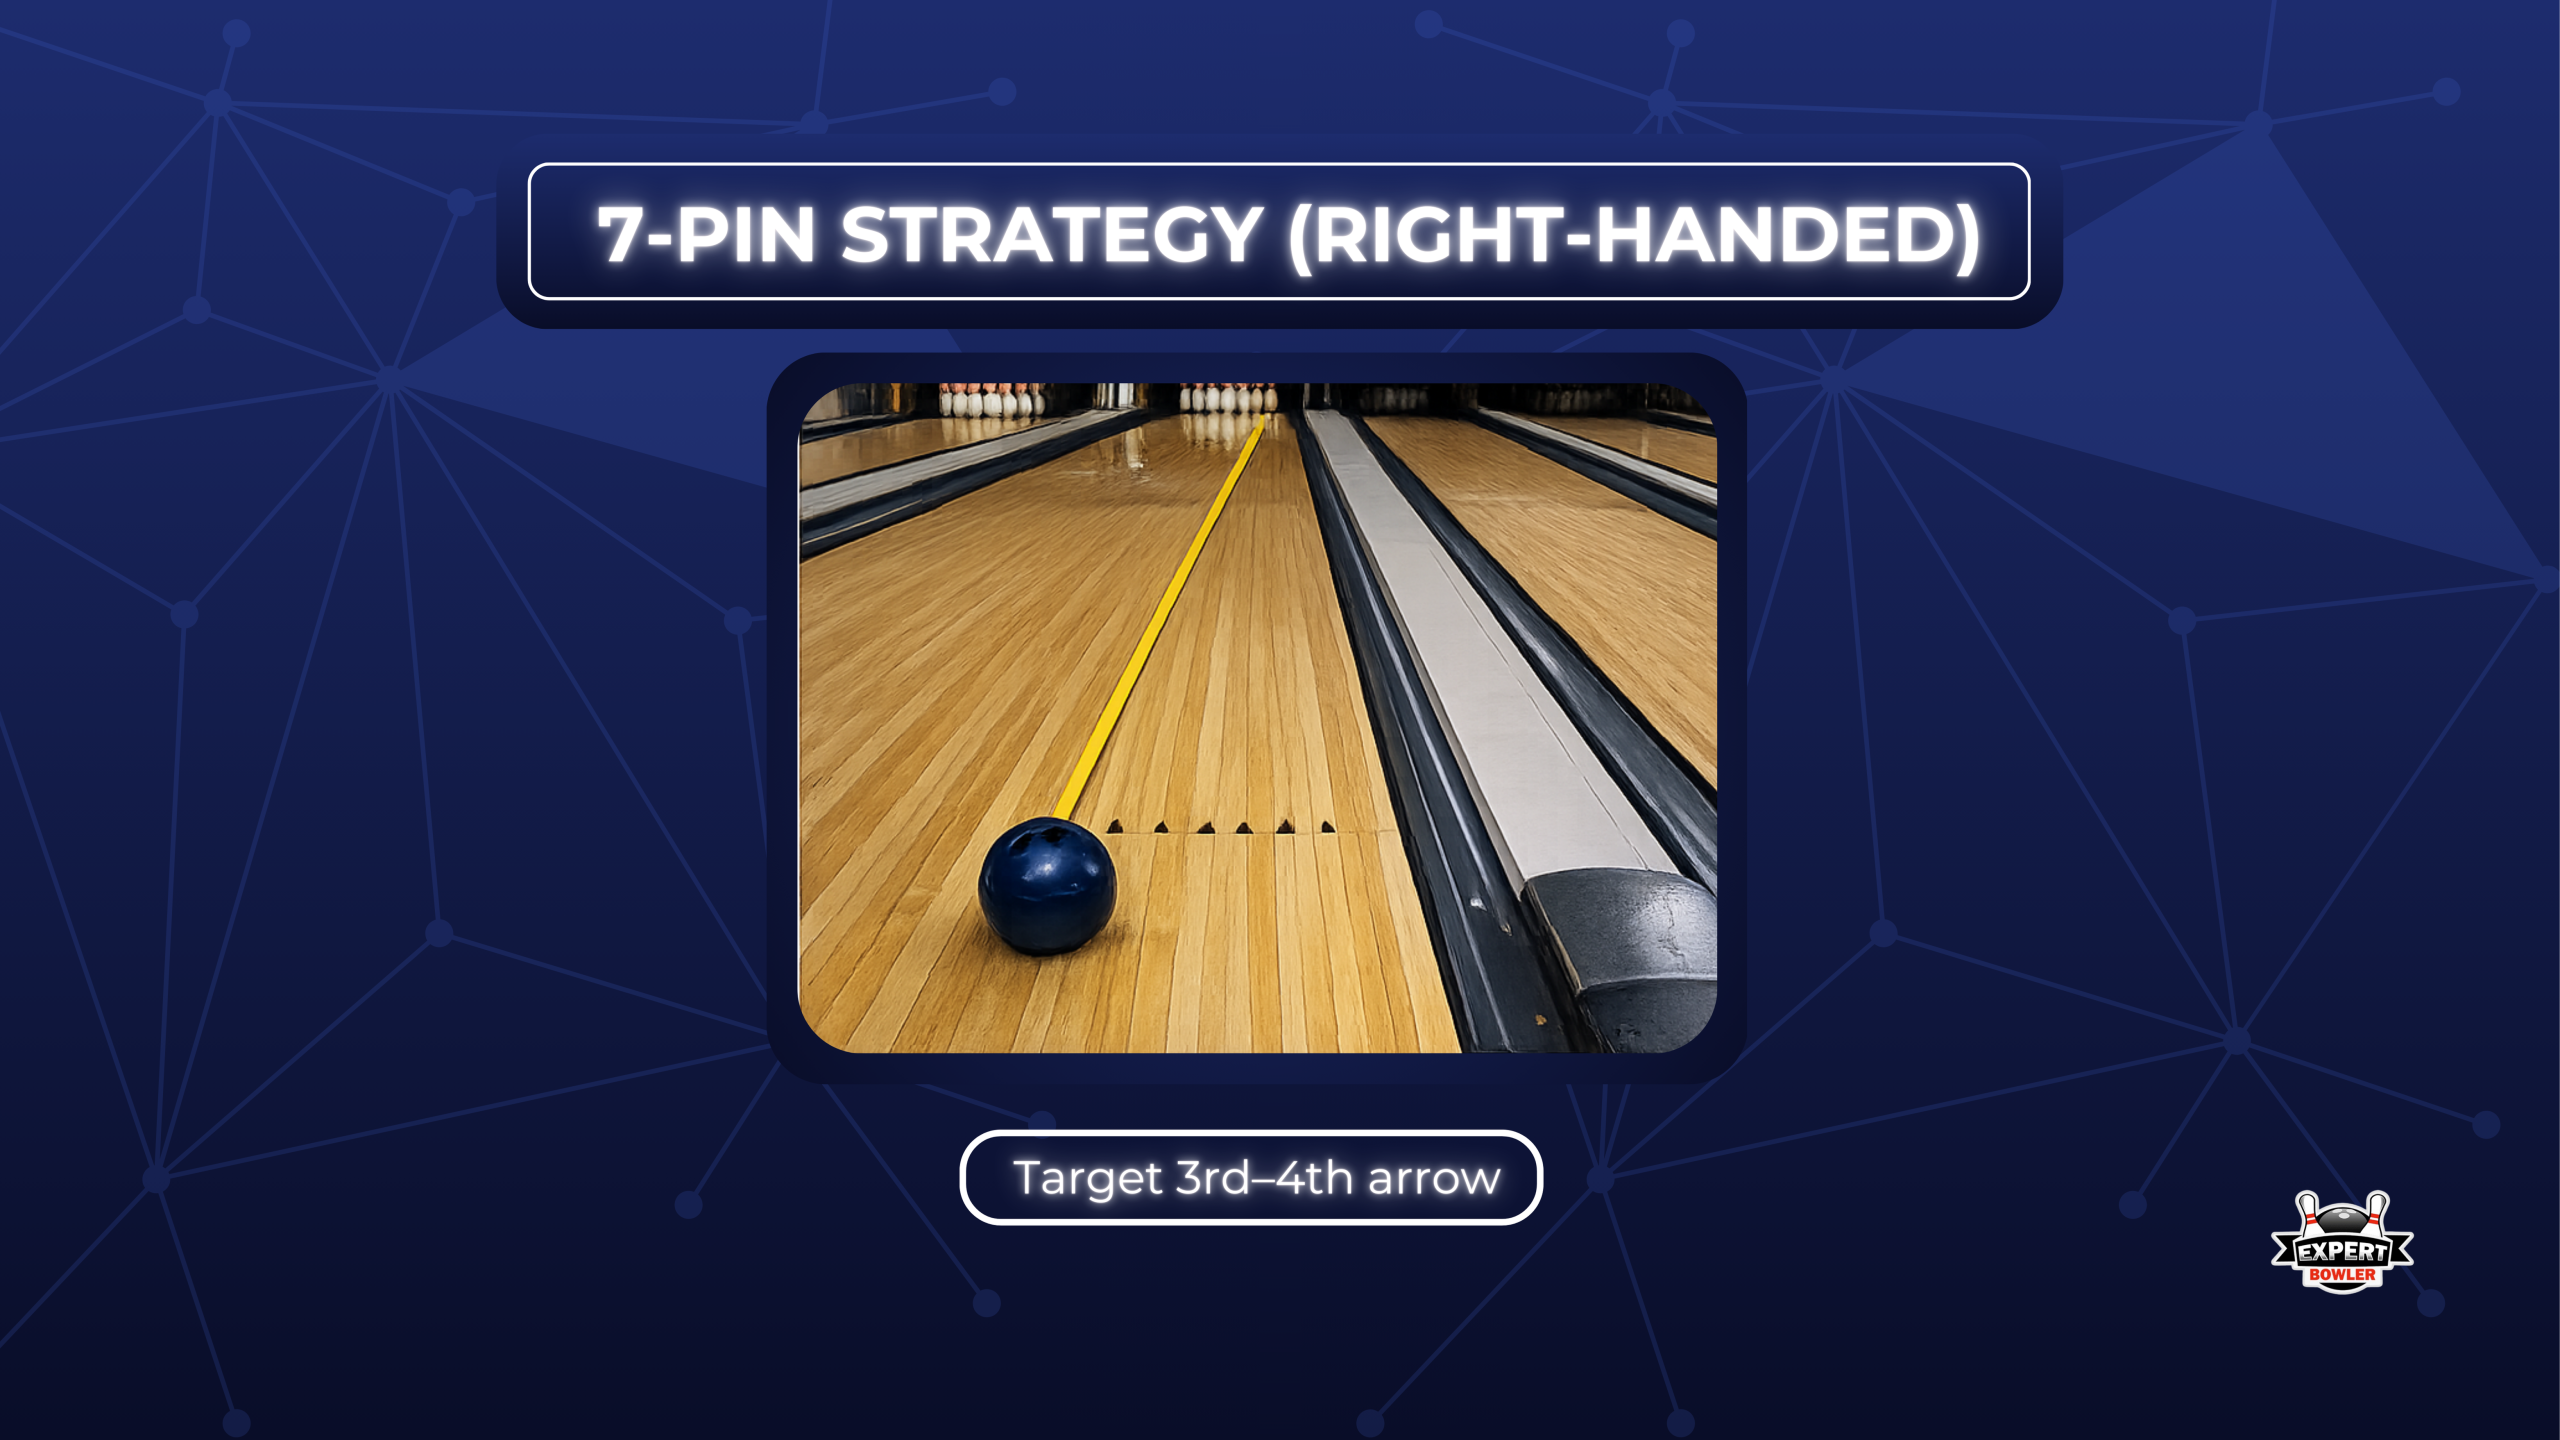
- Target somewhere between the third and fourth arrows. Board 17 is a good starting point.
- Adjust based on your ball speed and how much residual hook you have, even with a flattened wrist.
- Once you find a target that works, commit to it completely.
- Keep your eyes locked on that target throughout your approach. Looking at the pin or the gutter pulls your attention away from execution and causes you to steer the ball.
- When you miss, ask yourself what happened. Did you hit your target but miss the pin? Move your feet. Did you pull the shot or drift during your approach? Your target was fine, and execution needs work.
Common Mistakes to Avoid
Rushing causes more missed 10-pins than bad aim. After leaving a corner pin, especially one that should have fallen on your first ball, it’s tempting to grab your spare ball and fire without resetting. Take your time. Give every spare the same mental routine you give your first ball.
Using your strike ball on this shot creates unnecessary difficulty. That’s because reactive balls are designed to hook. And remember that once your line is correct, you have nearly eight boards of margin on each side of the pin. That’s a much bigger target than your nerves want you to believe.
Mastering the 7-Pin (for Right-Handers)
The 7-pin is actually easier than the 10 for right-handers because your natural hook curves toward the target rather than away from it. That built-in margin makes improving your 7-pin conversion more straightforward once you have a reliable approach.
Why It’s Tricky (and How to Simplify It)
Problems show up on dry lane conditions where too much hook carries the ball past the pin. Traditional spare systems can also put you uncomfortably close to the ball return.
The cleanest solution is the same cross-lane approach you learned for the 10-pin, just from the opposite side. This keeps your spare shooting mechanics consistent regardless of which corner you’re targeting.
Michelle Mullen covers more about this approach in her BOWL.com article on corner pin spares.
Lining Up and Targeting
The setup mirrors what you learned for the 10-pin, just from the opposite side of the approach. Follow these steps to build a consistent 7-pin shot:
- Stand on the right side of the approach with your slide foot around board 15.
- Square your shoulders to face the 7-pin and target between the third and fourth arrows. With a plastic ball and flat wrist, this shot becomes very repeatable.
- If you prefer using your strike ball, move about nine boards right from your normal position while keeping your same target arrow. The hook works with you here, curving toward the pin. Just know that lane transition affects this method more than the straight approach. What works in game one might need adjustment by game three as the oil pattern breaks down.
Knowing how to shoot corner pins is only part of a complete spare game. You need a bowling spare system that covers every leave on the deck.
A Simple System for All Other Spares
The 3-6-9 system has been taught for decades because it works. The concept is simple. Move your feet in three-board increments based on which pin you’re shooting while keeping your eyes fixed on the same target arrow.

A Simple System for All Other Spares
The 3-6-9 system has been taught for decades because it works. The concept is simple. Move your feet in three-board increments based on which pin you’re shooting while keeping your eyes fixed on the same target arrow.
The 3-6-9 System Explained
Start from your strike position and target, usually the second arrow.
For left-side pins, move your feet to the right. That means 3 boards for the 2-pin, 6 boards for the 4-pin, and 9 boards for the 7-pin.
For right-side pins, move your feet to the left. Move 3 boards for the 3-pin, 6 boards for the 6-pin, and 9 boards for the 10-pin.
Your target arrow stays the same throughout. The angle change created by moving your feet redirects the ball toward different parts of the pin deck.
How to Adjust for Different Pins
This system works best for middle-lane spares where oil patterns behave predictably. Pins like the 2, 3, 5, 6, 8, and 9 respond well to this approach. Modern lane conditions with sharper oil lines have made it less reliable for corner pins, which is why the cross-lane approach is preferred for the 7 and 10.
For multi-pin combinations like the bucket, target the front pin and throw through the formation with your strike ball to get the drive and pin action you need.
Not every leave is a spare you should expect to convert. Part of bowling spare shooting is knowing when to change your strategy entirely.
Tackling Splits and Combinations
Splits test both your accuracy and your judgment. Going for a low-percentage conversion might feel heroic, but it can cost you pins that a smarter play would have guaranteed.
Which Splits Are Makeable and Which to Ignore
The 3-10 baby split is absolutely worth attempting. You can thread the ball between both pins or slide the 3-pin into the 10. The 2-7 uses the same principle on the left side.
Closer splits like the 4-5, 5-6, and 5-7 require precise aim but remain makeable with practice.

Wide splits tell a different story. The 7-10 converts under 1% even among professionals who practice it regularly. The Greek Church, which is the 4-6-7-9-10, sits around 0.2% and is statistically the hardest split in bowling. It’s harder than the famous 7-10 despite getting less attention. These aren’t shots to practice or build a strategy around.
Prioritizing the Pin Count
When facing a split with odds below 5%, shift your focus to maximizing pin count. Position yourself to guarantee at least one pin, ideally two if the angle allows. Those extra pins accumulate across a season and can determine final standings in tight leagues where total pinfall matters.
Should You Use a Plastic Spare Ball?
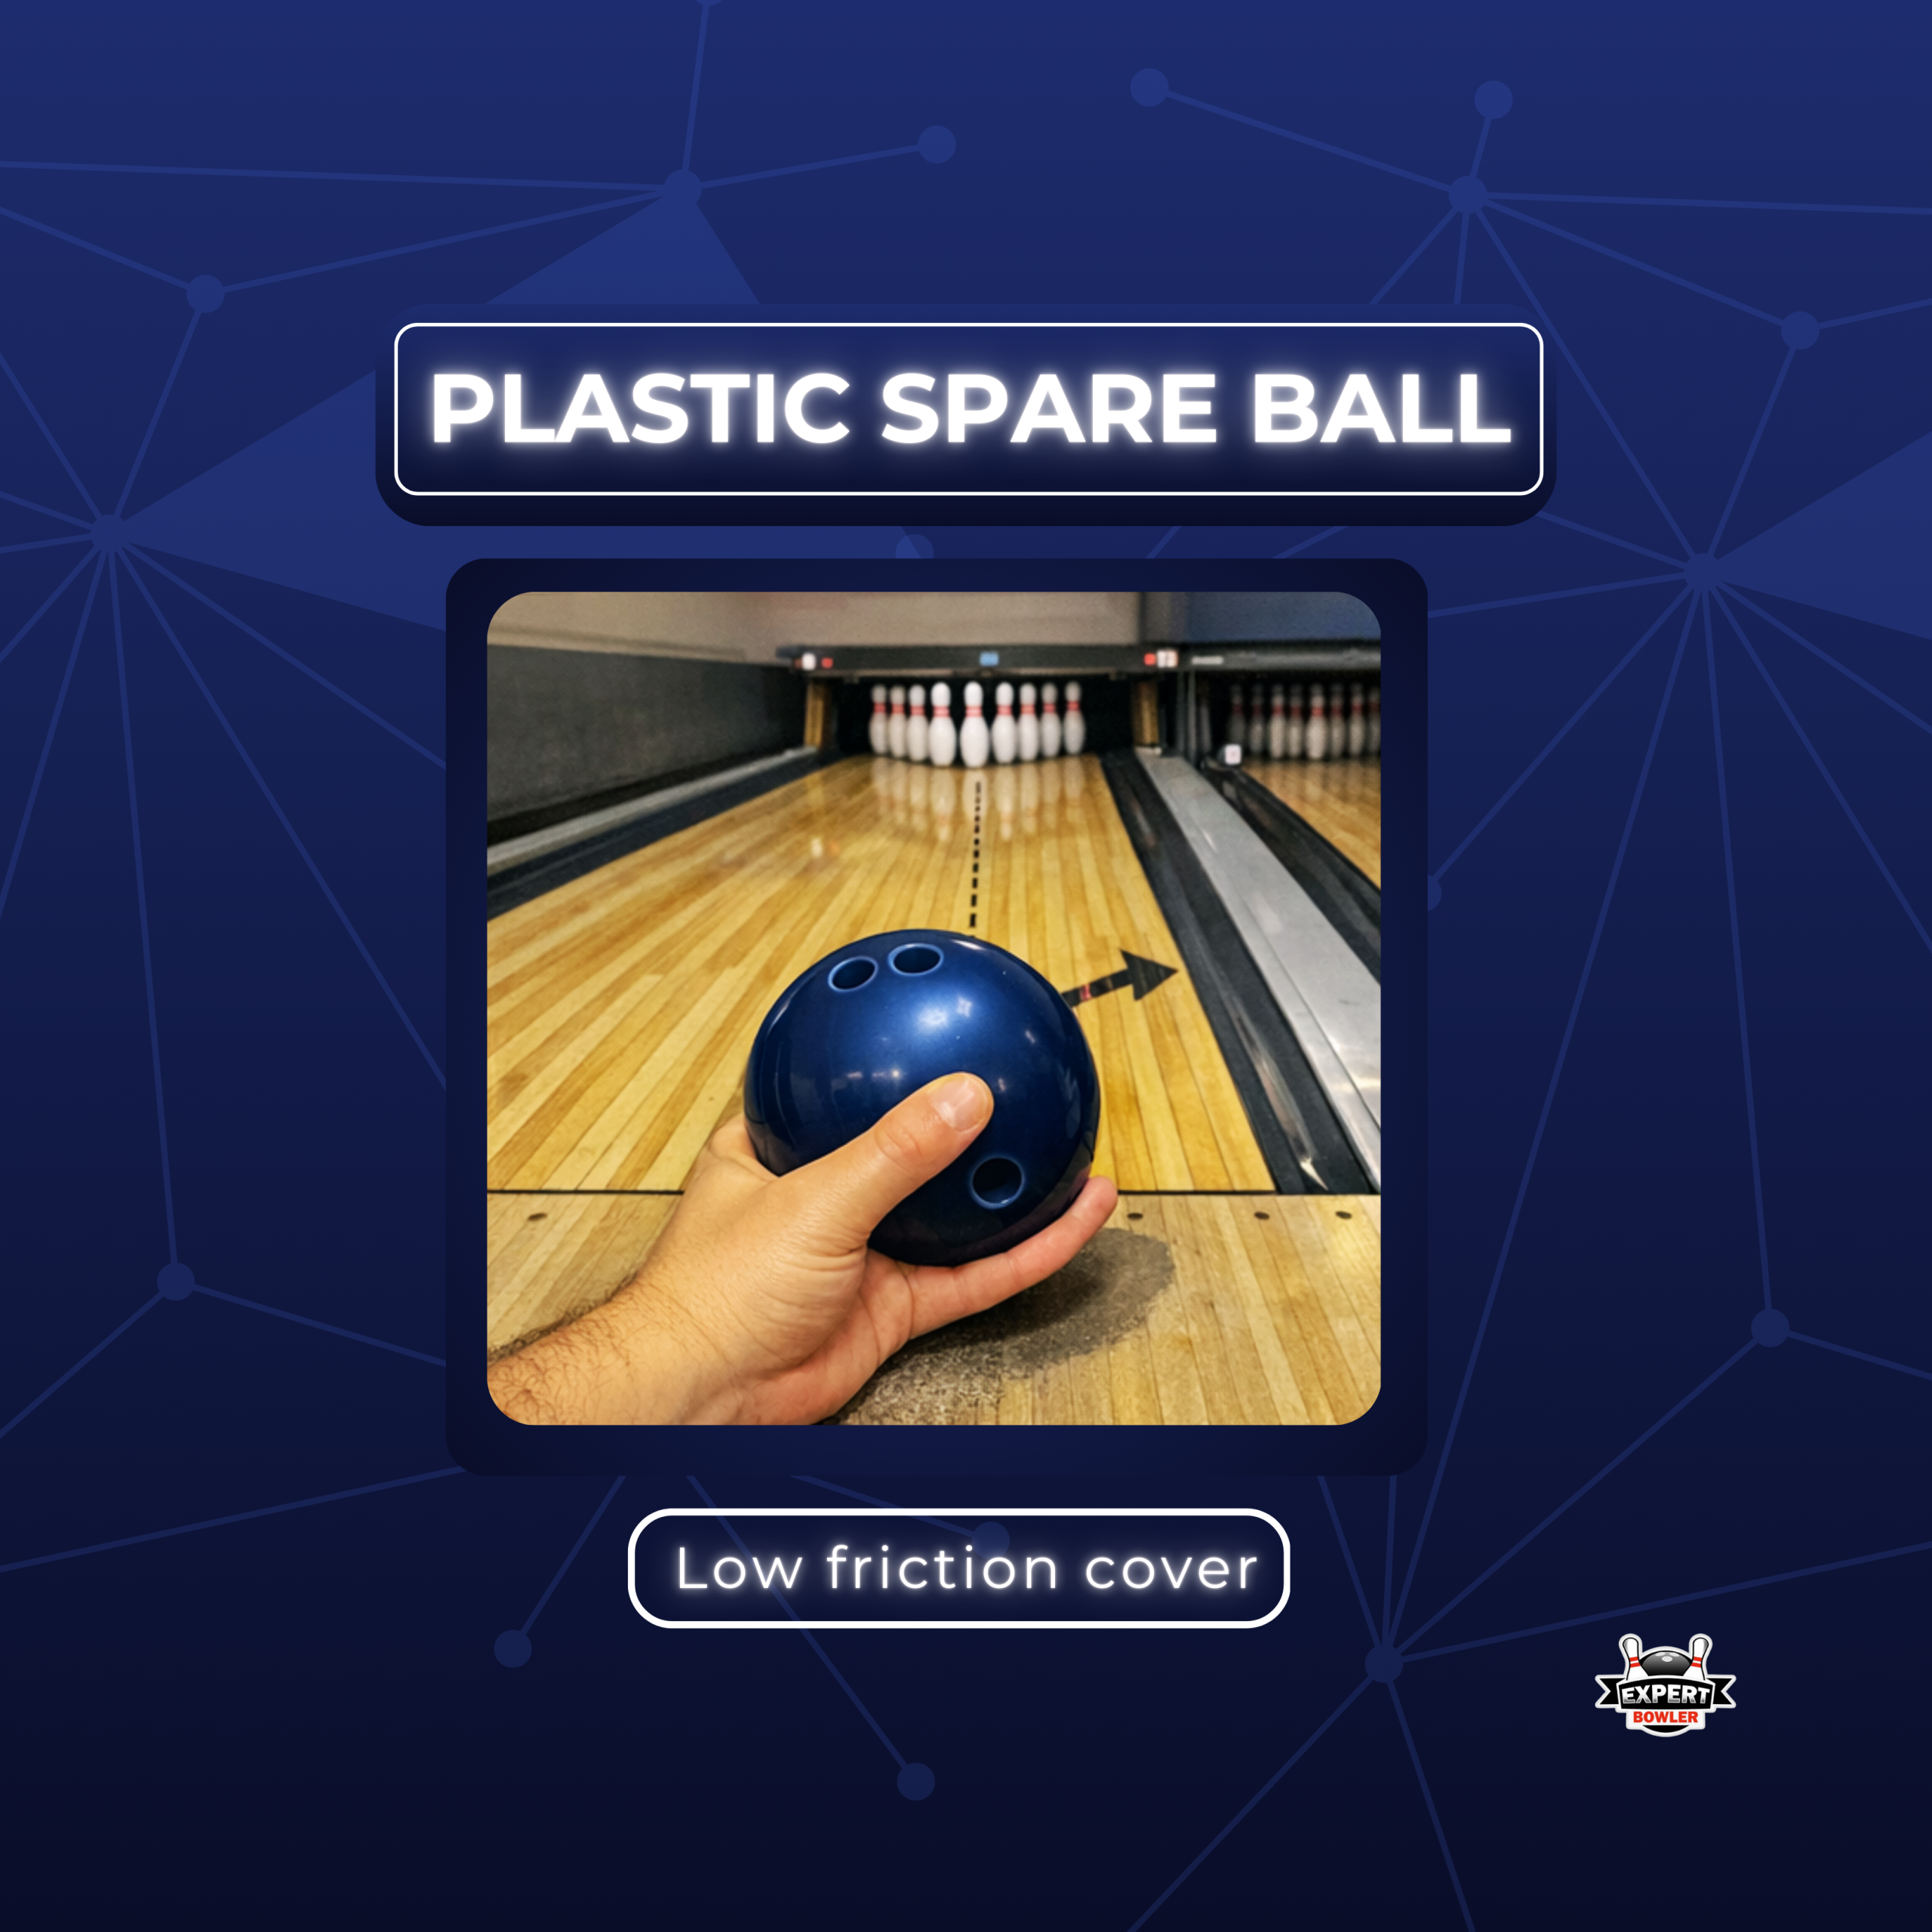
For corner pins, yes. Here’s why. Plastic coverstocks, which are the outer shell of the ball, have very low friction. This means the ball produces minimal hook regardless of lane conditions.
A plastic ball travels essentially straight whether it’s rolling over oil or dry boards. That predictability removes an entire category of variables from your spare shooting.
Reactive balls work against you on corner pins because they’re engineered to grip the lane and change direction. On the dry right-side boards, a reactive ball hooks sharply away from the 10-pin.
Virtually every professional uses plastic for corner pins because the consistency advantage is too significant to ignore. The Brunswick T-Zone, Columbia White Dot, Storm Mix, and Hammer Widow Spare are all solid choices. Keep your spare ball in good shape by following a regular bowling ball cleaning and maintenance routine.
Also, check out our recommendations for the best plastic spare balls if you’re looking to add one to your bag.
Frequently Asked Questions
Should I use a plastic ball for spares?
Use a plastic ball for corner pin spares like the 7 and 10. Plastic doesn’t hook on dry boards, giving you a straighter, more predictable shot. For middle-lane spares like the 2, 3, or 5 pin, your strike ball works fine since those pins sit in the oiled zone.
Why do I keep missing the 10-pin left?
Missing the 10-pin left usually means your ball is hooking away from the target. Switch to a plastic spare ball, move your starting position to board 35 or higher, and focus on walking straight toward the foul line without drifting back to center.
Is the 3-6-9 system still effective?
The 3-6-9 system remains effective for middle-lane spares like the 2, 3, 5, 6, 8, and 9 pins. For corner pins, modern oil patterns make it less reliable. Most bowlers now use a cross-lane approach for the 7 and 10 instead.
What’s the easiest spare to practice?
The 10-pin is the best spare to practice first. Right-handers leave it more than any other single pin, so improving your 10-pin conversion adds the most pins to your average. The 7-pin uses identical mechanics from the opposite side.
Practice Drills to Improve Your Accuracy
Spare improvement comes from structured practice, not rolling at random leaves. Start each session with corner pins before throwing strikes. Set up 10-pin leaves and work your alignment until the shot feels comfortable, then do the same with 7-pin.
Dedicate at least half your practice frames to spares. Track your statistics by spare type so you know exactly where your conversion rates need work. Most scoring apps break this down automatically. If you’re converting 85% of 3-pins but only 62% of 10-pins, you know where to focus.
The 50/50 drill creates realistic pressure. Throw at a single pin first, then try to strike at whatever remains. This simulates game conditions better than full-rack resets, where there’s no consequence for missing.
Consistent bowling spare shooting adds 15 to 20 pins to your average over time. Unlike equipment changes, the improvement sticks because you’re building repeatable habits. It’s one of the most reliable ways to score better without changing anything else about your game.
For more on building consistency, check out our guide to reading lane conditions and our breakdown of how to master bowling scorekeeping.