
Bowling Ball Surface Guide: Grit Chart 500-4000 + When to Use Each
By Jeroen Kooij, Editor · Updated 2026
Ball reaction is inconsistent for one of two reasons: the pattern changed, or the surface changed without you noticing. Most bowlers account for the pattern. Fewer pay attention to what is happening to the cover over the course of a season, or even a session.
Lane shine builds, oil absorbs into the coverstock, and the ball that was reading perfectly in week three of league now looks flat on fresh oil and jumpy on the backend.
The fix is usually not a new ball. Learning how to resurface a bowling ball and when to do it is the faster, cheaper adjustment.
If you are not sure whether the problem is surface or pattern, the decision tree in the middle of this guide is the fastest way to find out.
What we cover in this guide
- What Is Bowling Ball Surface?
- Why Surface Changes Reaction Faster Than Most Bowlers Expect
- Grit Chart 500-4000 (What Each Range Does)
- How Your Release Profile Affects Grit Choice
- Surface Decision Tree
- How to Resurface a Bowling Ball at Home (Step-by-Step)
- Fresh to Transition: When to Change Surface vs Line
- Common Surface Mistakes and Fixes
- Maintenance Schedule: Clean, De-oil, Re-surface
- Frequently Asked Questions
- How to Resurface a Bowling Ball: Putting It Into Practice
What Is Bowling Ball Surface?
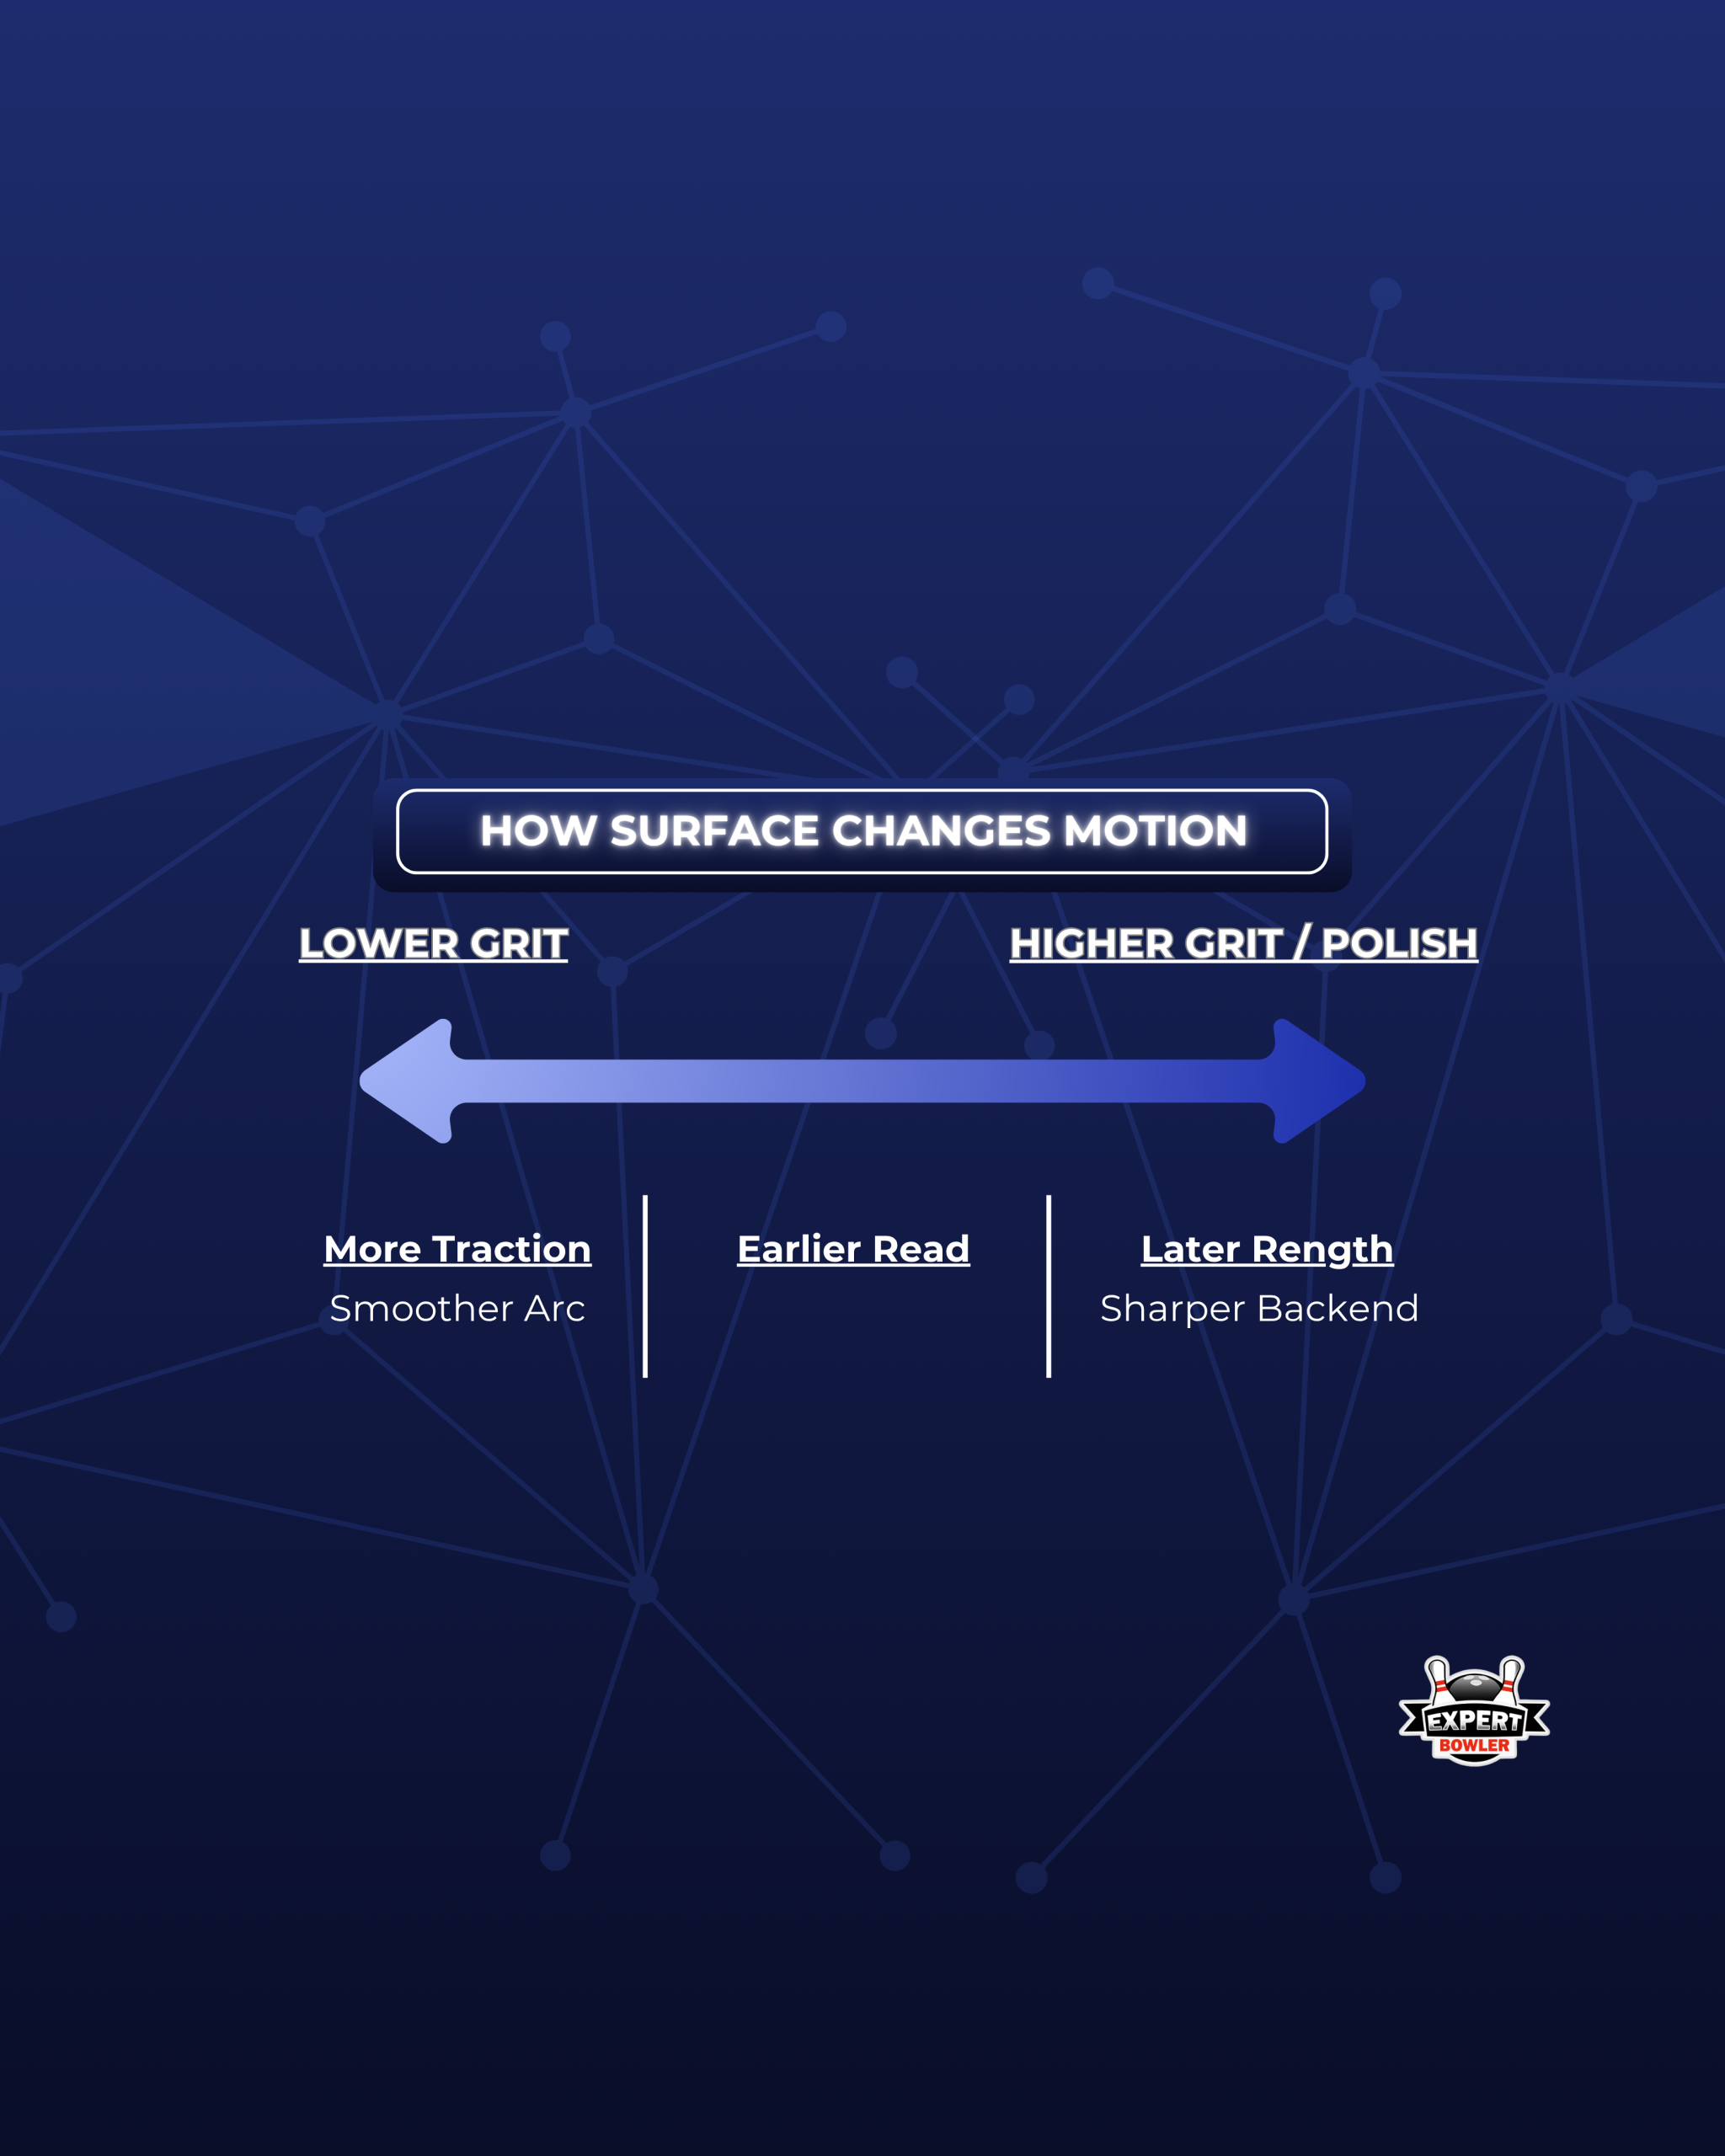
The bowling ball surface is the finish condition of the coverstock, described by grit level or polish. Lower grit creates an earlier, smoother read into the oil. Higher grit or polish creates more length before the ball responds. Surface is often the fastest practical adjustment available before switching to a different ball.
Why Surface Changes Reaction Faster Than Most Bowlers Expect
The coverstock is the only part of the ball touching the lane. A rough surface has deep peaks that create friction with the oil immediately. A polished surface has shallow peaks that let the ball skid through the front part of the lane before friction builds. Change the surface, and you change the entry point into the backend.
This applies across cover types: solid coverstocks read friction earlier than pearl or hybrid covers at the same grit, which means a solid at 2000 and a pearl at 2000 will not behave identically.
Core type — symmetrical or asymmetrical — along with RG and differential, influences flare potential and motion shape. But surface typically produces faster and more predictable changes than layout or core adjustments on a given oil condition. If the ball is not reading right, surface is the first thing to rule out.
Answer four quick questions and our free Bowling Ball Finder matches you to the right ball for your style, lanes and budget — plus a free buyer’s checklist, instantly.
Take the free Finder →Grit Chart 500-4000 (What Each Range Does)
Use the table as a reference point, then read the breakdowns below for details.
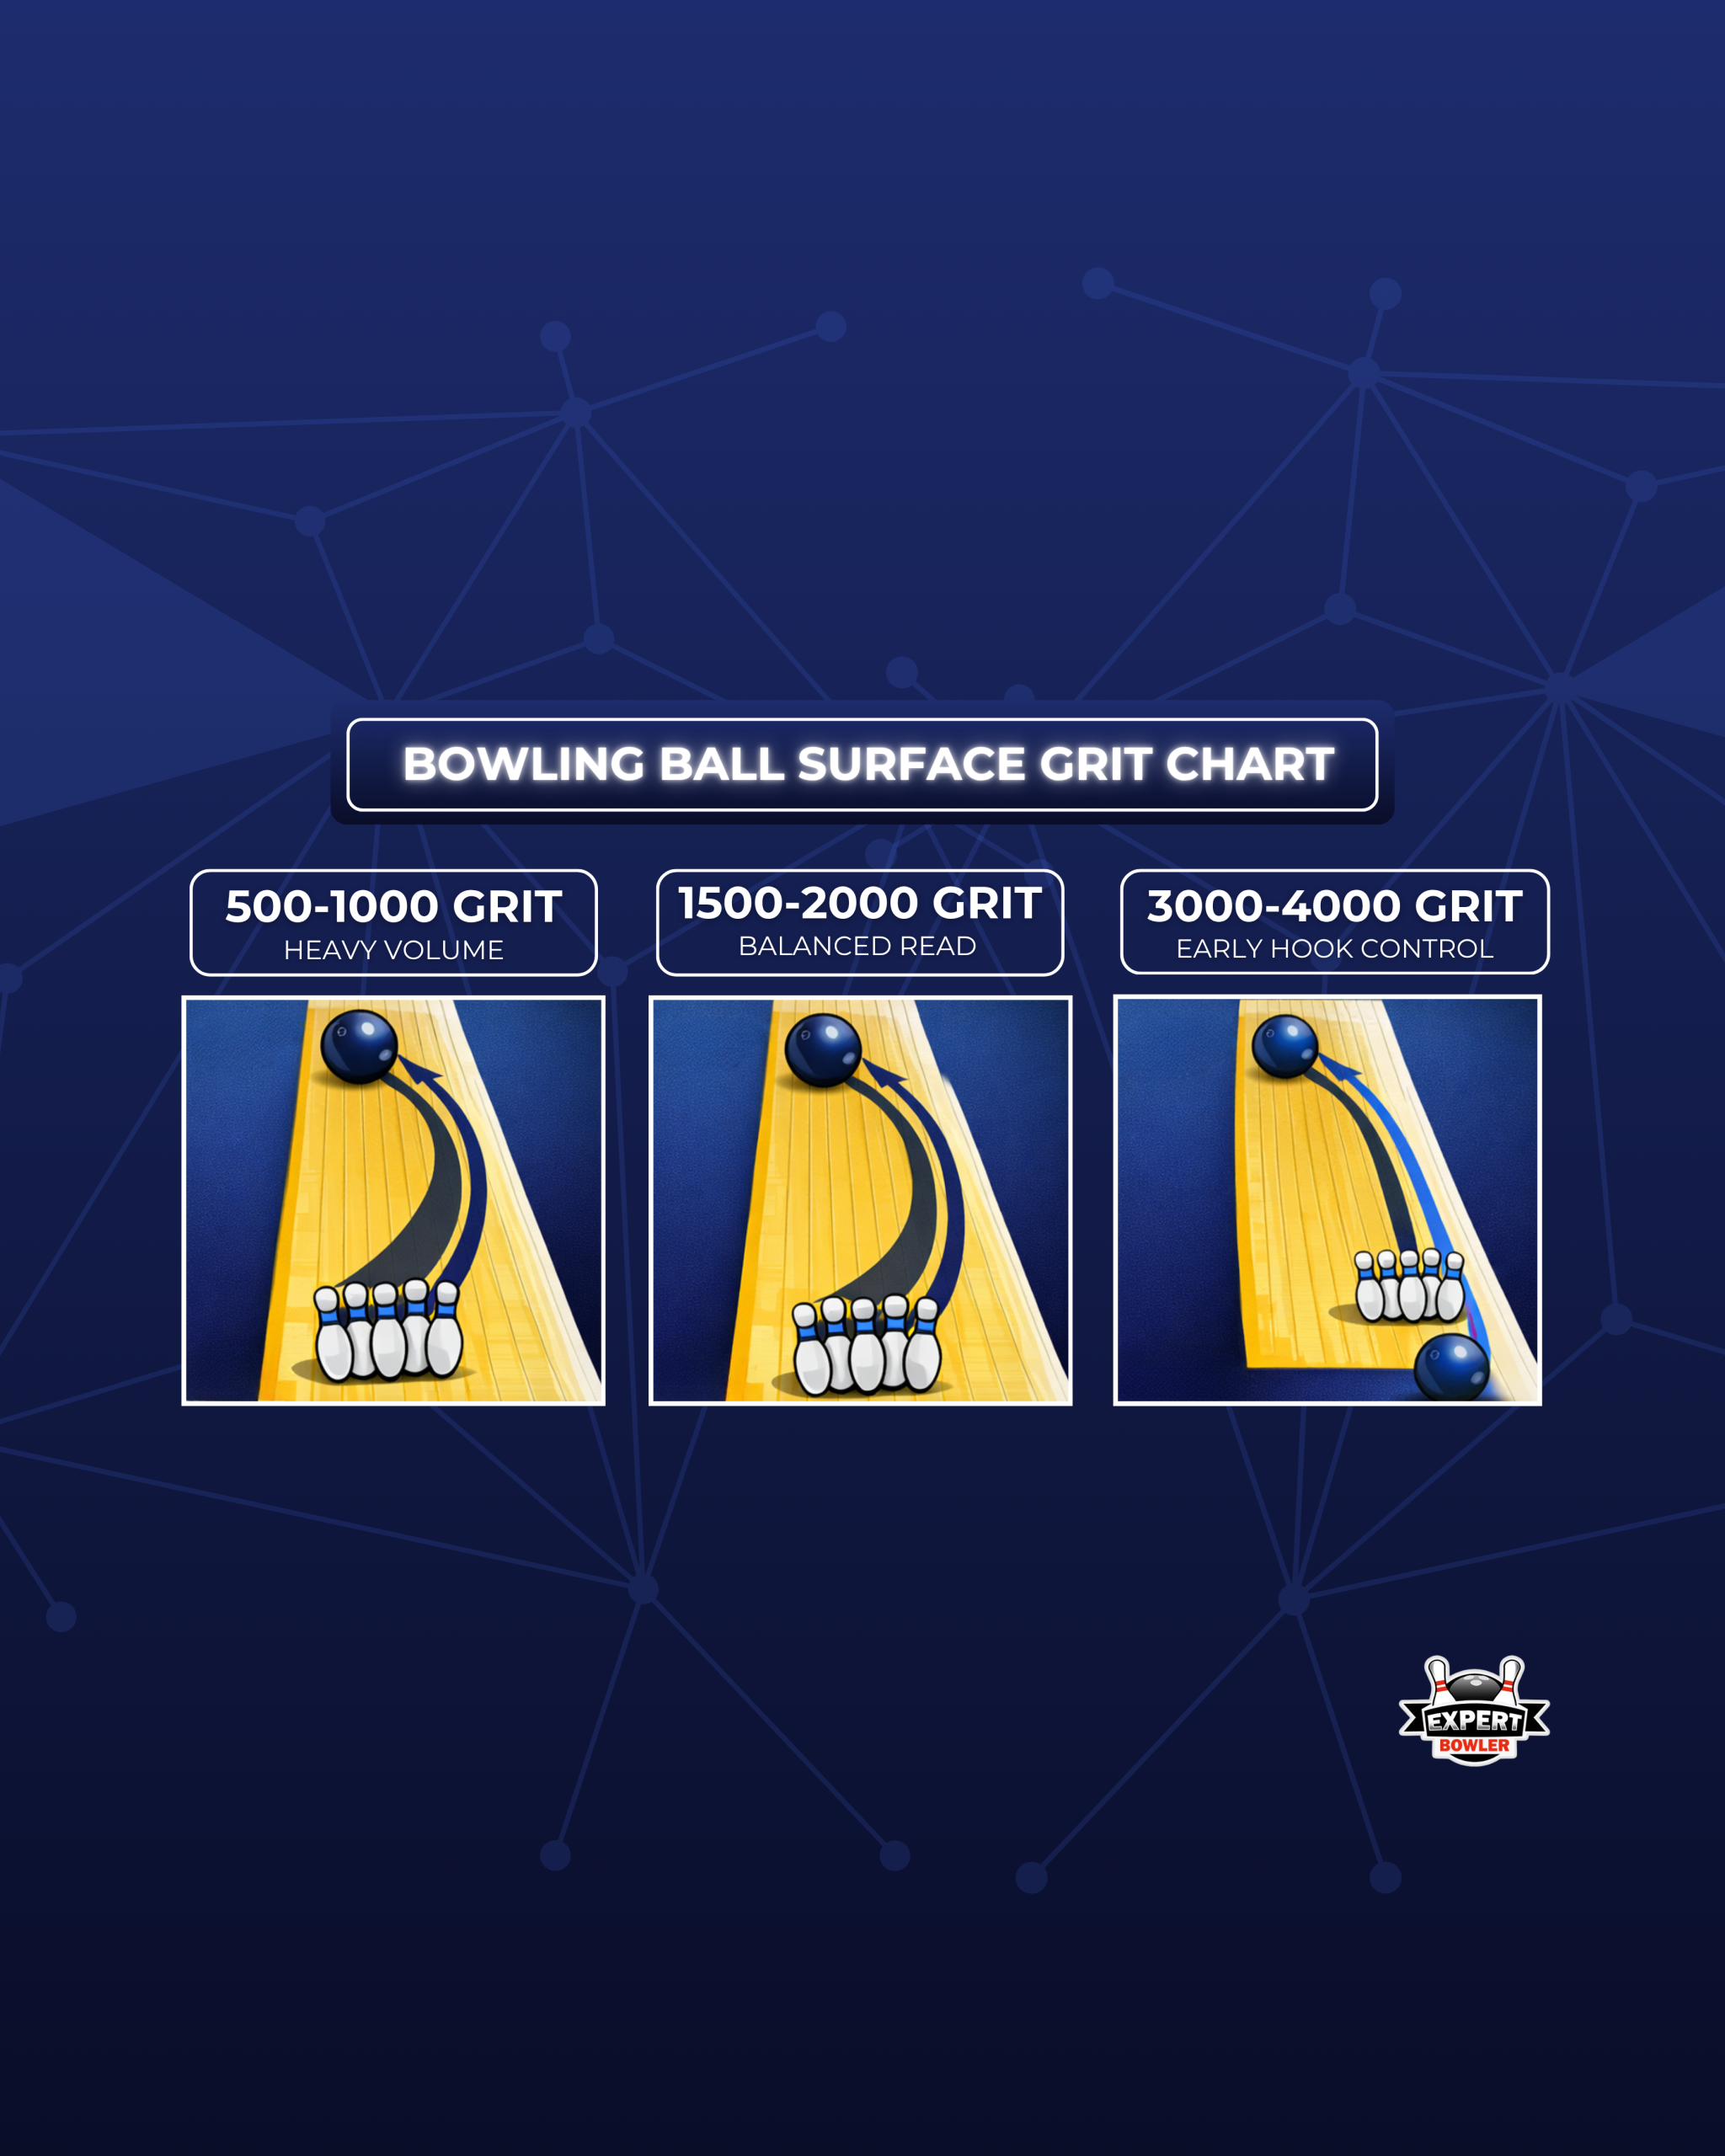
500-1000 Grit
This range creates the most friction between ball and oil. The cover grabs early, and the reaction shape is smooth and arcing rather than angular. This is the setup for heavy-volume patterns or when you need the ball reading consistently from the front rather than skidding through, which is why a ball like the Black Widow 3.0, with its strong backend, needs this range to stay controllable on heavier oil.
1500-2000 Grit
The middle range. Most factory finishes land here, and it is where the majority of house shot conditions are best served. The ball reads the midlane without snapping too hard off the breakpoint, which is why it holds up across the widest range of releases and angles.
The Storm Hy-Road ships at 1500 grit from the factory, a deliberate choice that puts it right in this window, balanced enough to work across conditions without needing surface adjustments every session.
3000-4000 Grit and Polish
Maximum skid. The ball stays in the oil longer before engaging friction, which produces more length and a sharper backend move.
On a transition lane where the track has burned out, and the dry is pronounced, polishing bowling ball covers gives the ball back its length and energy transfer. It also works to soften an over-reactive ball on a shorter or lighter pattern.
If you have bowled with the Motiv Venom Shock, you already know what this shape looks like.
Best Bowling Balls 2026
Looking for our top equipment picks? Start with the full ball roundup.
How Your Release Profile Affects Grit Choice
High speed and rev rates often need a smoother finish, while lower speed or rev rates need a rougher surface to generate the same front-end traction.
A speed-dominant bowler who overwhelms friction needs a different starting point than a rev-dominant bowler who generates early traction regardless of surface. A matched bowler generally follows standard grit-to-condition logic most closely.
Surface Decision Tree
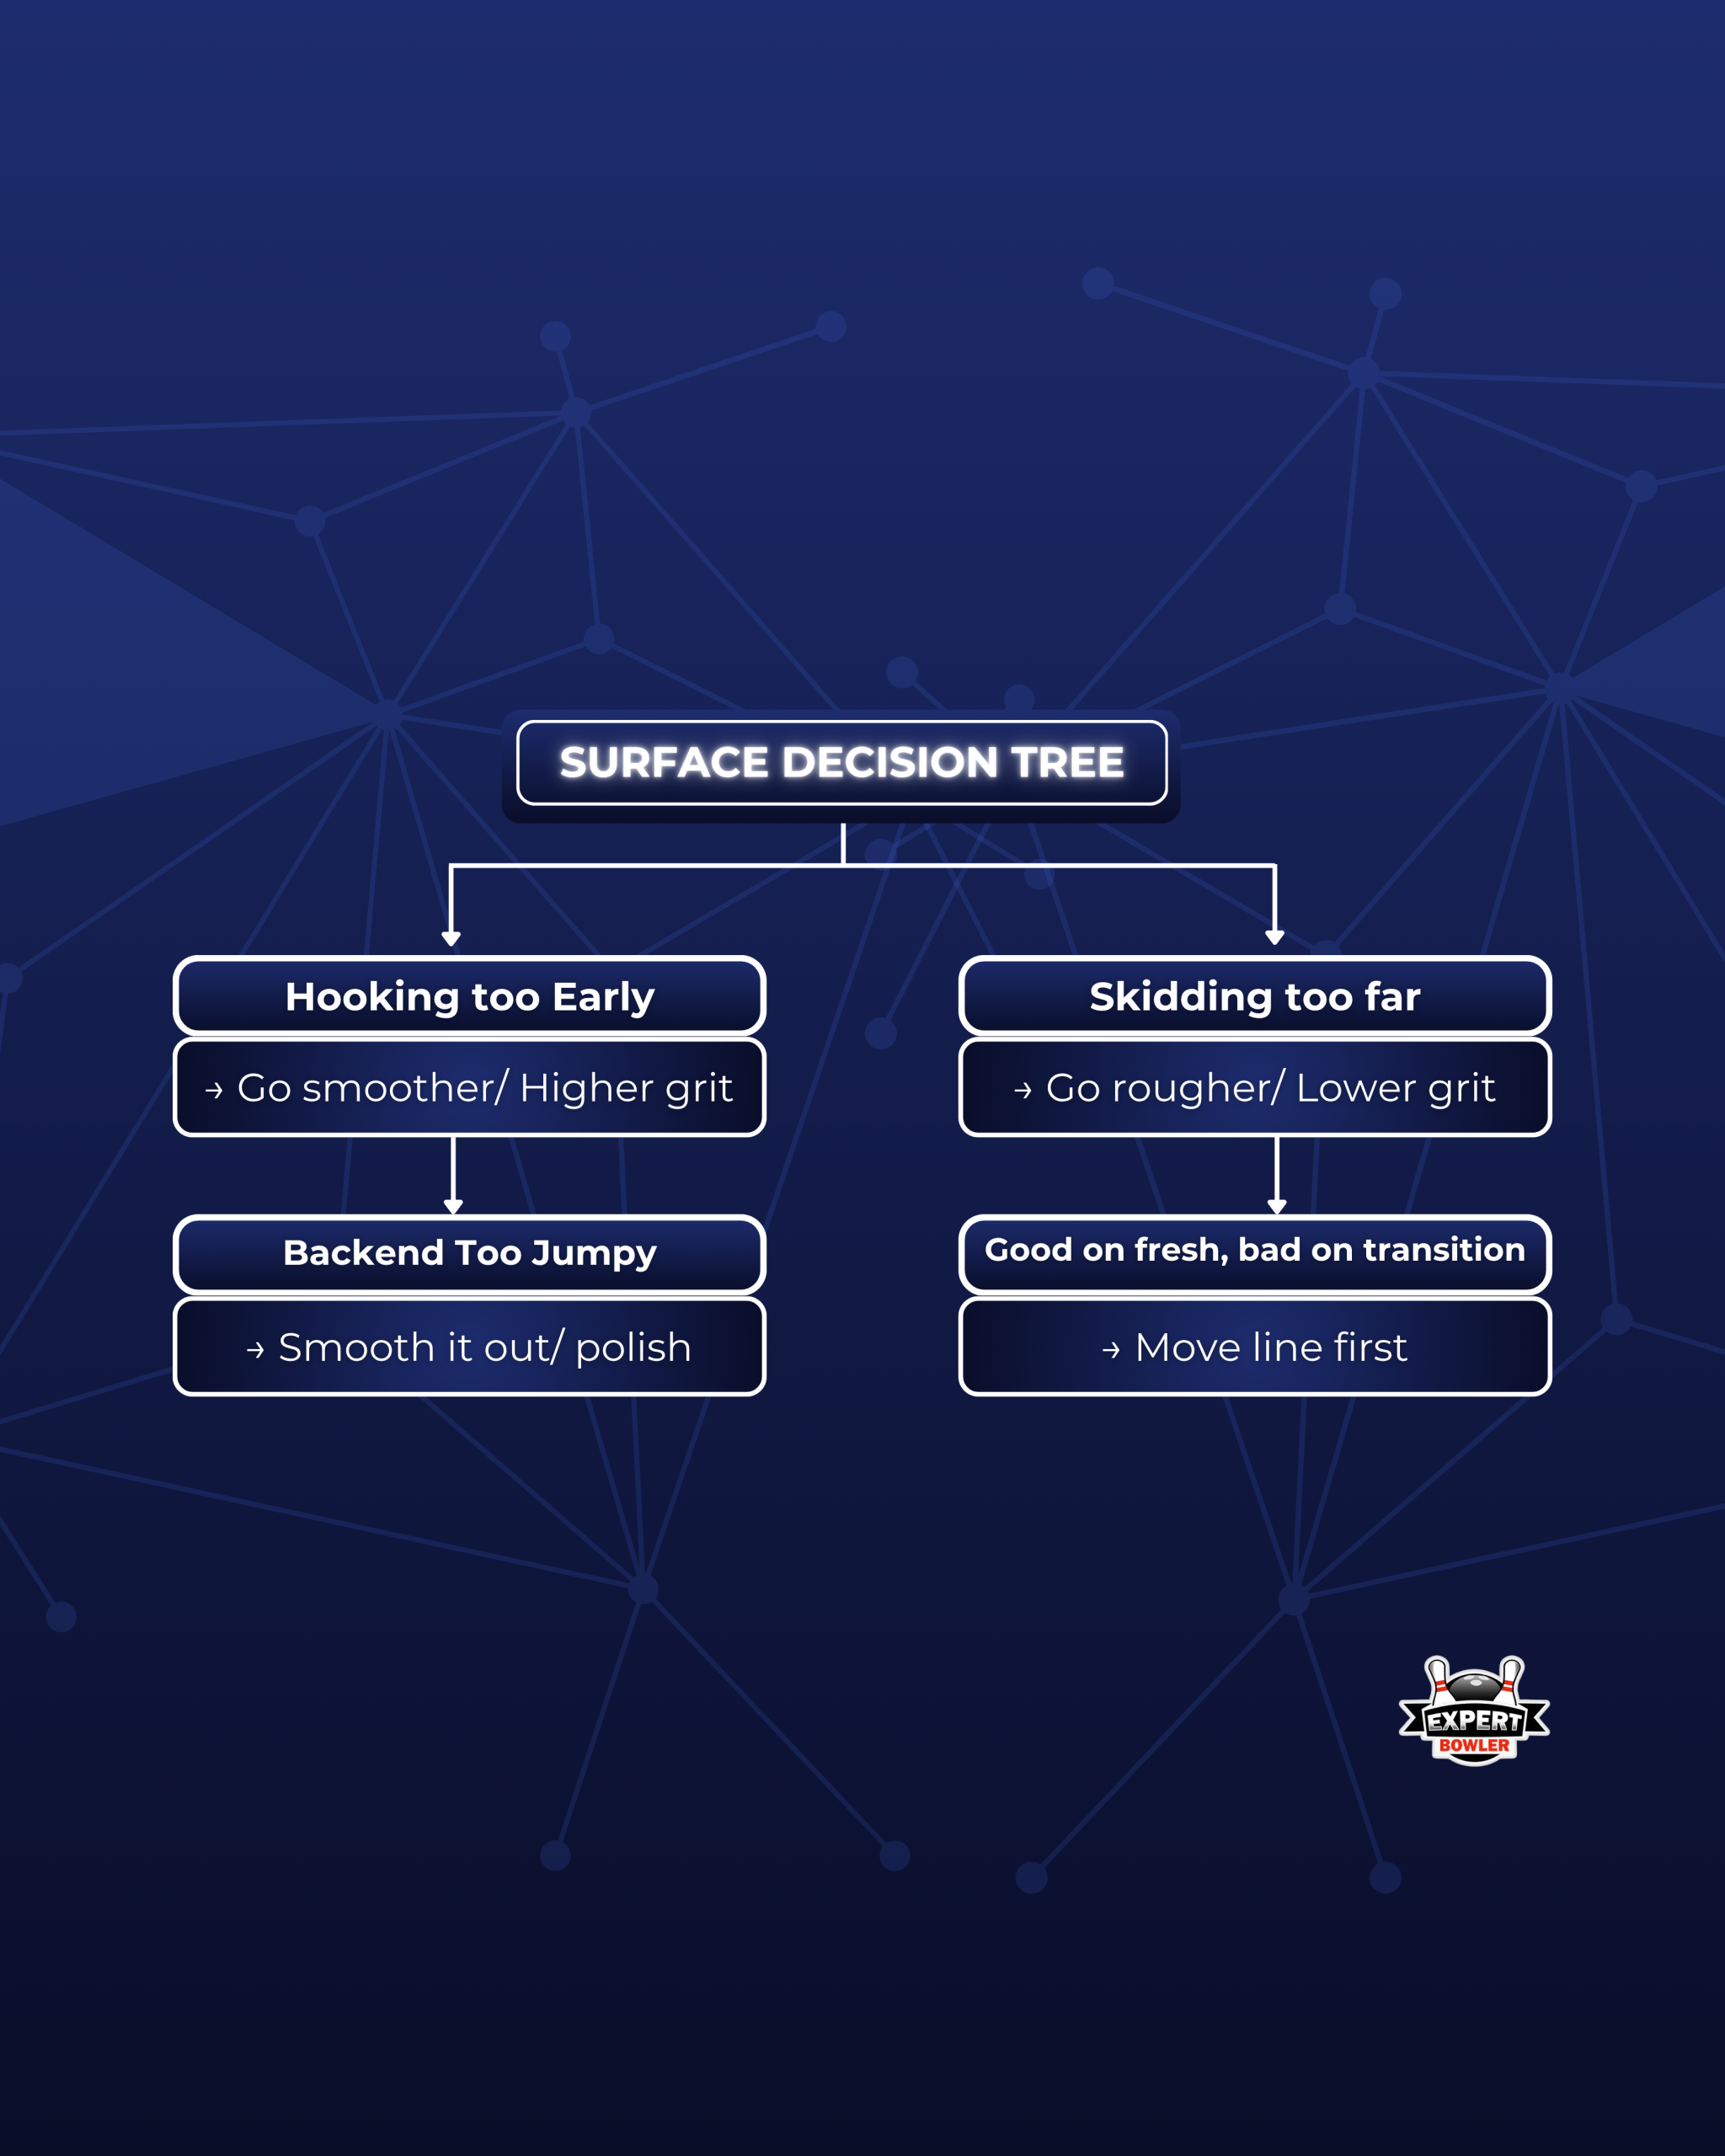
Already know what grit you need? Skip to the step-by-step. Still figuring out what the ball is doing? Work through these in order.
Change one thing at a time. Once you make a change, use the four-point check at the end of the step-by-step before touching anything else.
- The ball seems right on fresh, but falls apart on transition: Consider adding polish. As oil breaks down, friction in the dry zone increases, and the ball needs more runway before engaging. Understanding bowling oil patterns helps you anticipate when that shift is coming and how far to adjust.
- The ball is hooking too early or too much on fresh oil. Go one step further. From 1000 to 2000, from 2000 move to 3000 or add polish. Do not jump straight to polish if one step has not been enough yet.
- The ball is skidding too far or not reading at the breakpoint. Drop one grit step before you consider changing balls. From 2000 to 1500, from 1500 to 1000. If the reaction does not shift after testing on fresh oil and later frames, the ball may not be the right fit for the pattern.
- The backend is too angular, or the ball over-revs through the pins: Smooth the surface. Adding polish or moving to a higher grit blends out the backend shape and reduces the snap. This is a common fix on shorter patterns or on transition when friction in the dry is producing more angle than the entry angle can absorb.
- Multiple issues at once: Address the surface first on fresh oil. On late-breakdown lanes, adjust the line and ball position before altering the surface. Do not change the surface and target line in the same session if you want to understand which change made the difference. Isolate one variable.
How to Resurface a Bowling Ball at Home (Step-by-Step)
If you have not identified the surface change you need yet, go back to the decision tree first. This section is about execution, not diagnosis.
What you need
Abralon or Siaair sanding pads in your target grit range, water, a ball spinner or sanding block, a USBC-approved cleaner, and a microfiber towel or see-saw.
Use pads made specifically for bowling balls. Automotive sandpaper is not calibrated the same way and will leave an inconsistent finish.
We put together a rundown of the best bowling ball sanding pads if you need to compare before buying.
How to Do It
- Clean and inspect first. Wipe the ball and assess the current reaction and oil condition. If the ball has absorbed significant oil over many games, de-oiling before sanding gives you a more accurate read on the surface change.
- Secure and lubricate. Mount on a spinner or hold steadily. Spray the pad with water. Wet sanding prevents the pad from loading and produces a more consistent cut across the surface.
- First pass at your target grit. Sand each side of the ball for approximately 30 seconds at the starting grit, roughly four full rotations on a spinner. Use firm, even pressure across the full surface, not just the track. USBC rules require uniform surface preparation across the entire ball. Avoid tilting the pad or pressing harder on one side.
- Second pass at one grit step finer. Reduce pressure by about half. Approximately 15 seconds per side. This smooths the peaks left by the coarser pass and evens out the finish. Do not oversand at this step.
- Polish if needed. If targeting a polished finish, knowing how to polish a bowling ball correctly matters as much as the grit work. Use a polishing pad with a small amount of bowling ball polish and buff 20-30 seconds per side. Some heat builds during polishing, which aids penetration.
- Final clean. Remove all dust and polish residue with a USBC-approved cleaner. The surface should feel slightly tacky, not wet. Let it dry before bowling.
- Test on both fresh and transition conditions. A surface change that looks right in frame 1 may not hold the same shape in frame 8. Test on fresh oil and check again after significant oil depletion before committing to the new surface as a permanent setup.
A quality see-saw removes oil film from the track more thoroughly than a flat wipe. If you are replacing yours, our best bowling ball see-saw reviews cover what holds up over a full season.
On the cleaner side, not every USBC-approved formula works the same way on polyester versus reactive covers. We compared them in our best bowling ball cleaner reviews if you want the full breakdown before committing to one.
Once you have made the change, go back to the same signal that identified the problem. If front-lane read was the issue, check whether it has normalized across fresh oil and later frames. One signal, confirmed or not, tells you whether to hold the surface or adjust again.
Fresh to Transition: When to Change Surface vs Line
Surface and line adjustments solve different problems, and the sequence matters:
- On fresh oil — surface first. The pattern is intact, and friction is predictable, so the cover is the primary variable.
- During transition — line first. The track area dries, carrydown pushes oil further down the lane, and surface changes become harder to predict because the pattern itself is shifting. Move with the oil before touching the grit.
Scenario 1: Ball Hooking Too Early on Fresh Oil
You show up with your ball at factory finish: 2000 grit with a light polish. In the first three frames, it hooks four boards early and misses the pocket left every time. Nothing about the pattern explains it.
The problem is the cover: the polish is producing too much length through the heads, but the ball is snapping before the breakpoint rather than tracking through.
You rough it to 1000 grit before the next session. The ball reads the midlane cleanly, carries through the pins, and holds its shape into game two. The ball did not change. The surface did.
Scenario 2: Ball Checking Up by Game Three
A different situation: your ball is reading well in frames one through five, then starts checking up hard at the breakpoint by game three. You move left, then deeper. Nothing holds.
The issue is transition: the track has burned out, the dry zone has extended, and your ball is hitting more friction earlier than the surface was set for.
You add polish before the next session. The ball gets more runway through the front, skids a little longer, the backend smooths out, and the reaction stabilises through the back half of the set.
That is a surface-to-condition mismatch. Keeping the cover in that state between sessions comes down to cleaning cadence and knowing when to de-oil, both covered in detail if you follow a structured bowling ball cleaning and maintenance routine.
Scenario 3: Nothing Works
Both scenarios had a surface fix. But sometimes neither rougher nor smoother moves the ball in the right direction. That usually means the cover chemistry itself is not suited to the conditions you bowl on regularly.
Our guide to the best medium oil bowling balls is a good place to start on house shots, and if the outside boards are drying out early, our best bowling balls for medium to dry lanes cover the right options for that.
Common Surface Mistakes and Fixes
These show up repeatedly, usually from bowlers who are doing the surface work correctly but getting unpredictable results. Often, the issue is not the technique of sanding a bowling ball itself but the process around it.
Changing the surface and ball position at the same time. If you adjust the surface and move your feet in the same session, you have no way of knowing which change produced the result. Isolate one variable. Surface first on fresh oil, then line if the surface change was not enough.
Uneven pad pressure while sanding. When sanding bowling ball surfaces, tilting the pad or pressing harder on one side creates gouges or valleys in the cover. Use light, consistent pressure and let the abrasive do the work. The goal is an even texture across the full track, not a fast cut.
Skipping grit steps. Jumping from 500 directly to polish leaves an inconsistent finish. Work through the range or, at a minimum, use the ball’s original factory grit as the anchor point for the last step. If the manufacturer spec says 500/1000/2000, finishing at 2000 gives you the factory look.
Sanding more than the ball needs. Resurfacing every week gradually reduces coverstock thickness and hook potential over time. Sand when the ball has lost reaction consistency, not on a fixed schedule. If you are bowling more than a few times a month on tough house patterns, every 15-25 games is a reasonable benchmark for lower-grit finishes.
Using non-bowling sandpaper. Automotive pads and generic sandpaper are not calibrated the same way as Abralon or Siaair pads. They cut coarser than labeled and produce unpredictable results on a bowling ball cover.
Bake the ball in a kitchen oven. Uneven heat can warp the core and is not reversible. When embedded oil is the problem, you need a purpose-built rejuvenator that pulls it out without risk to the ball. We reviewed the options worth buying in our best bowling ball rejuvenator reviews.
Maintenance Schedule: Clean, De-oil, Re-surface
Surface work only holds if the maintenance around it is consistent. A ball that is resurfaced correctly but never cleaned properly will drift off that finish faster than it should.
If you are unsure how often to resurface a bowling ball, the schedule below breaks it down by finish type and games played.
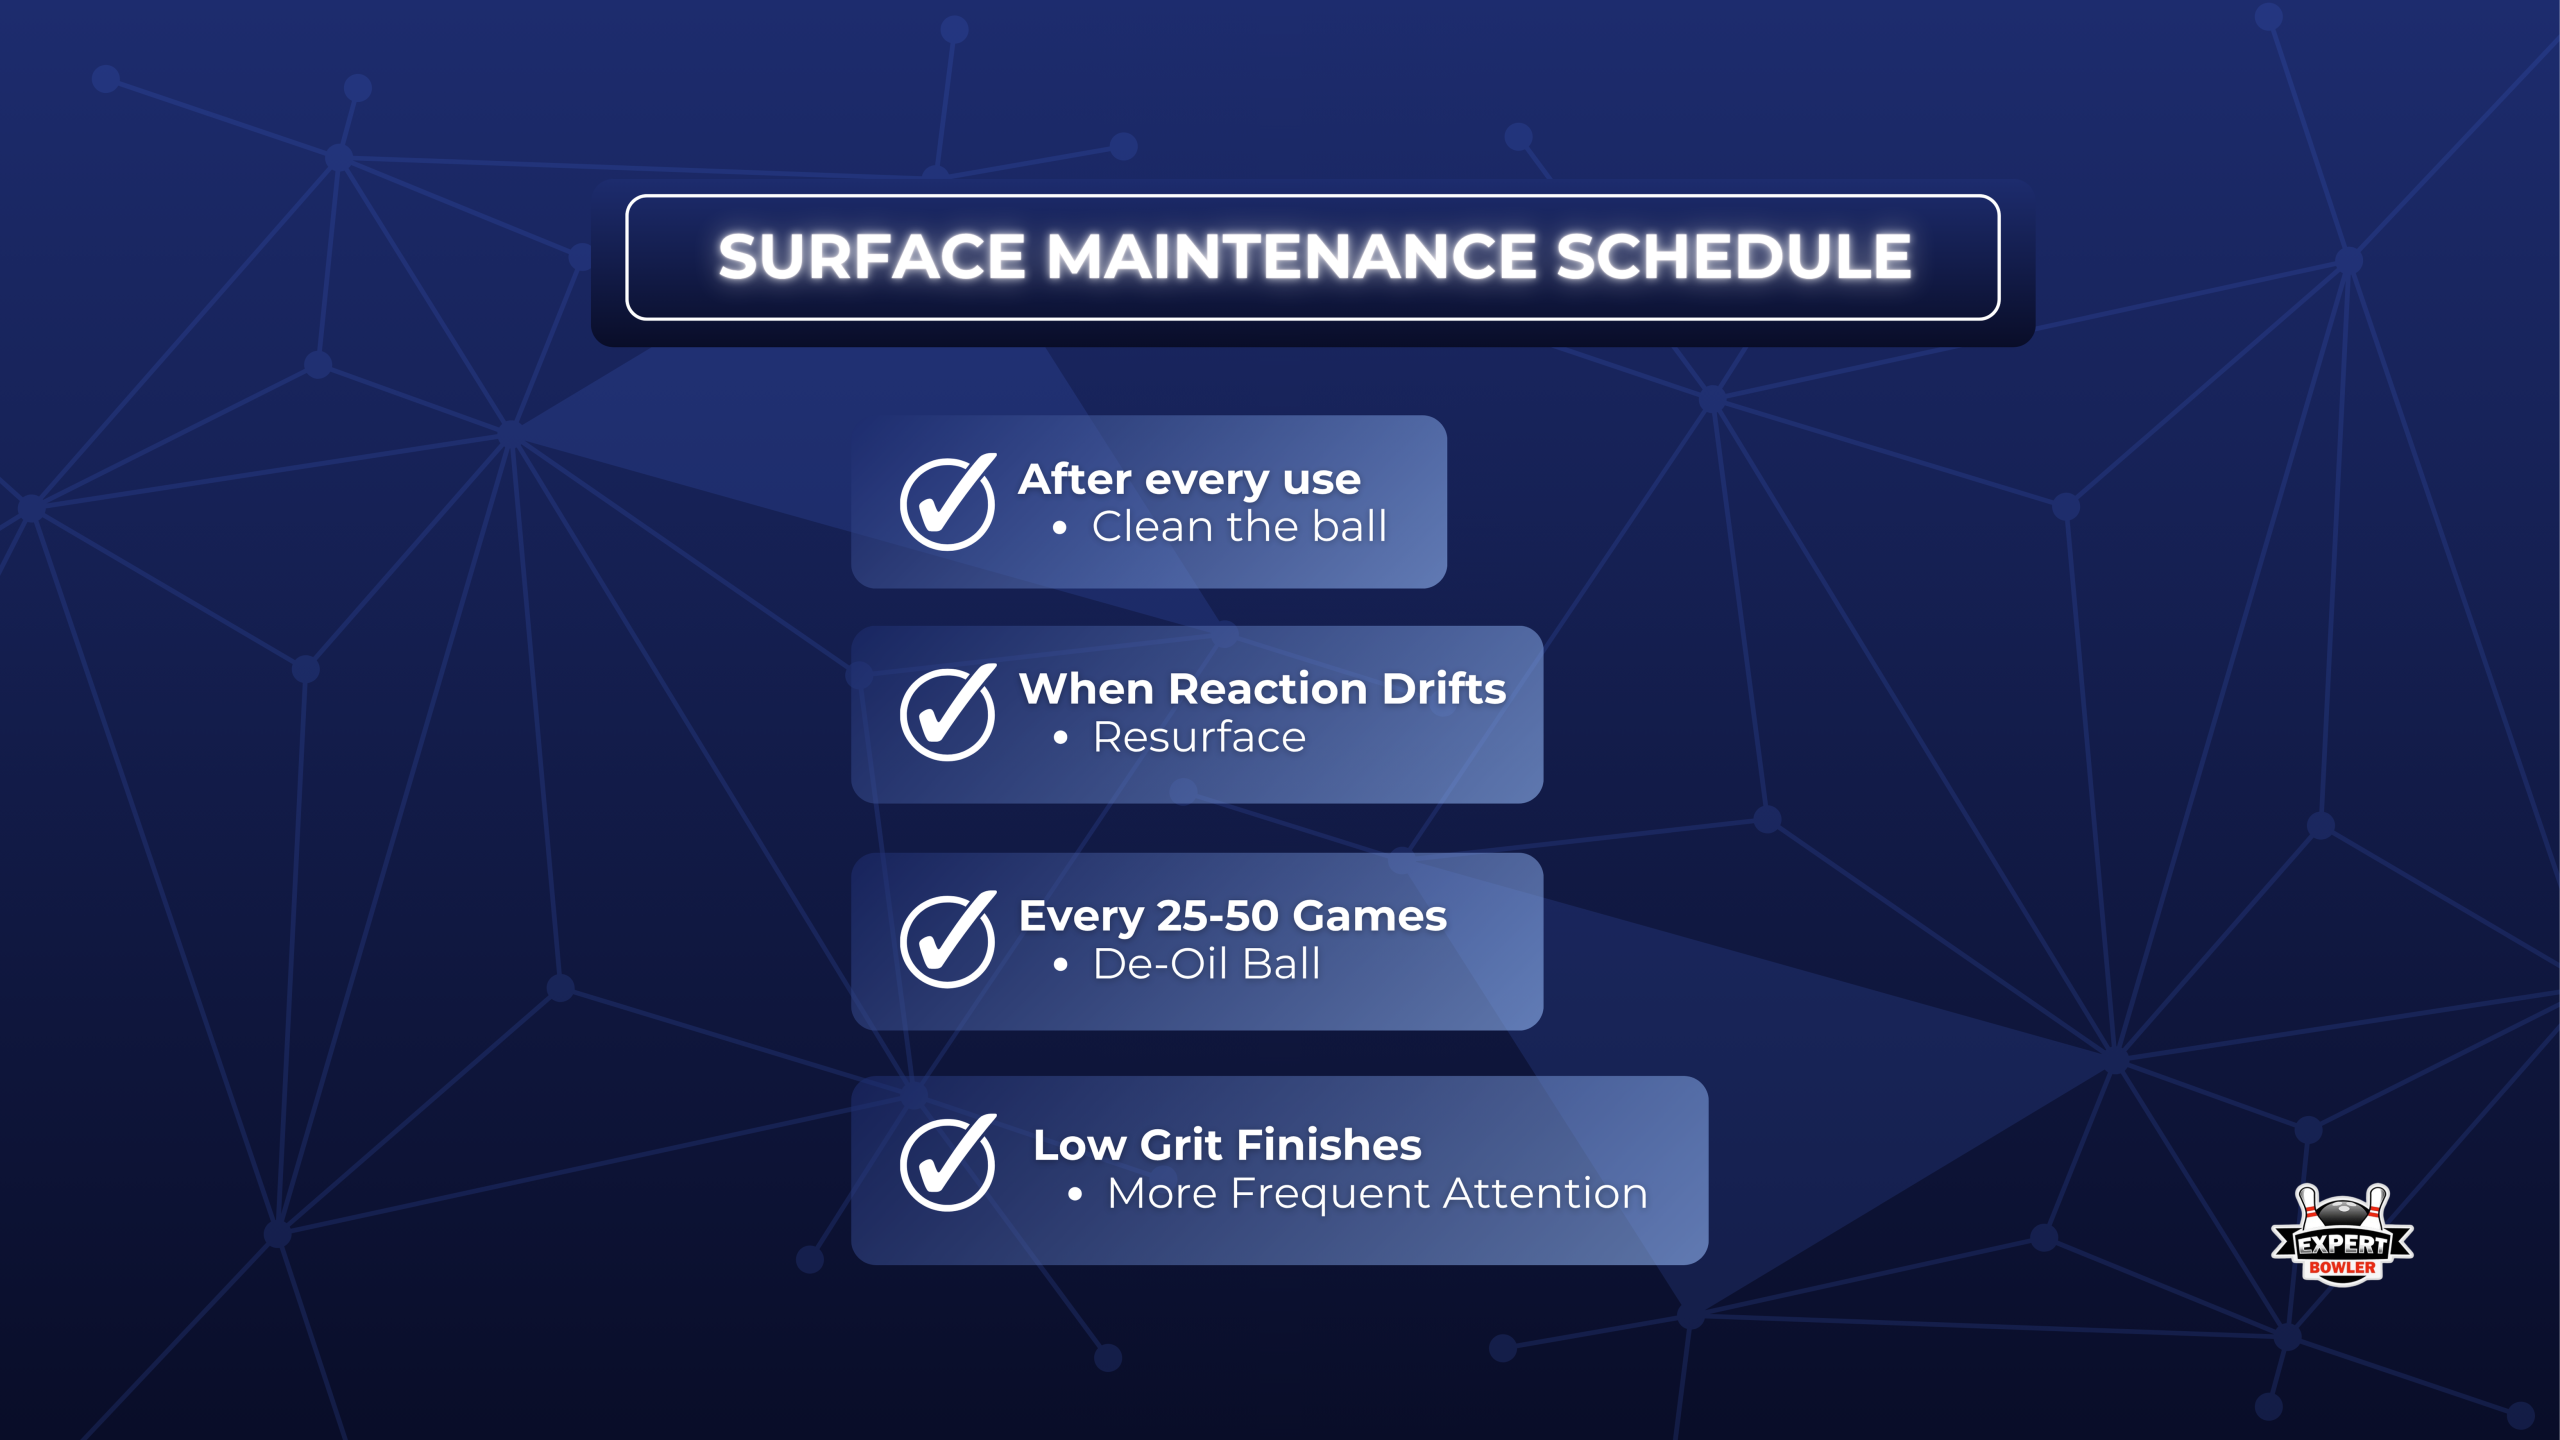
After Every Use
Wipe the ball with a USBC-approved cleaner after league or practice. Lane dressing and oil build on the surface and gradually alter the friction profile. A microfiber see-saw removes the film from the track more thoroughly than a flat wipe. Even with a polished ball, consistent post-session cleaning keeps the actual surface from drifting.
Deep Cleaning Every 25-50 Games
Regular wiping does not extract oil that has absorbed into the coverstock over time. A ball rejuvenator pulls that embedded oil out and restores the cover’s original chemistry.
A ball thrown 3-4 times a week needs this more often than one that only comes out for league night. Every 25-50 games is the practical range. If you bowl a lot, stay toward the lower end.
Resurfacing Schedule
Lower-grit finishes wear faster and need more frequent attention. A dull ball may need refinishing every 15-25 games. Polished balls hold their finish longer, though they still drift over time.
The practical signal is simpler than any schedule: if the ball’s reaction has become inconsistent despite regular cleaning, resurface.
Before each session, check the track area. Visible oil buildup or a dull, uneven look in the cover means the surface has drifted from its intended state.
Frequently Asked Questions
How often should I resurface a bowling ball?
Go by reaction, not a fixed calendar. Lower-grit (dull) finishes drift faster and often need attention every 15–25 games; polished balls hold longer. The real signal: if reaction has become inconsistent despite regular cleaning, it is time to resurface.
Can I resurface a bowling ball at home?
Yes. With Abralon or Siaair pads in your target grit, water for wet-sanding, and a spinner (or steady hold), you can resurface at home. Sand each side evenly, step through grits, and finish with a USBC-approved cleaner. For a polished finish, add a polishing pad step.
What grit should I use on my bowling ball?
500–1000 for earlier read on heavier oil, 1500–2000 as the all-round house-shot benchmark, and 3000–4000 or polish for more length and a sharper backend on transition or drier lanes. Match grit to your release: higher speed/revs lean smoother, lower speed/revs lean rougher.
How many times can a bowling ball be resurfaced?
Every resurface removes a small amount of coverstock, so there is a limit — most balls handle many light surface adjustments but only a handful of deep full resurfaces over their life. Sand only when reaction has genuinely drifted, not on a fixed weekly schedule, to preserve cover thickness and hook potential.
What is the difference between resurfacing and polishing?
Resurfacing uses abrasive pads to reset the cover’s texture (grit). Polishing is the finishing step that smooths the peaks further for maximum length and a sharper backend. You can resurface without polishing, but a polished finish always starts with a clean, evenly sanded surface underneath.
Does my ball need resurfacing or just cleaning?
If a wipe-down or deep clean brings the reaction back, it was an oil/surface-film issue — cleaning was enough. If reaction stays flat or inconsistent after a proper clean and de-oil, the surface texture itself has worn or drifted, and resurfacing is the fix. Always rule out cleaning and oil saturation first.
How to Resurface a Bowling Ball: Putting It Into Practice
Surface work fails when bowlers change too many things at once and cannot trace what fixed the problem. Change one thing, test it, write it down. Most reaction problems that get blamed on the ball are a surface issue that never got properly diagnosed.
When the surface is not the answer and a new ball is, our guide to the best bowling balls for league bowlers covers the right options by condition and skill level.
Quick-Reference Checklist
- Pin down one specific reaction problem before touching the ball. Too early, too late, too jumpy. Pick one.
- Change the surface one step at a time and go back to fresh oil before deciding if it worked.
- Sand with firm, even pressure across the full surface. Uneven pressure causes gouges.
- Test on fresh oil and in later frames after each change before making another adjustment.
- Log leave patterns and carry after each surface change to track what worked.
- Clean the ball after every session with an approved cleaner to control lane-shine drift.
- De-oil every 25-50 games with a rejuvenator. Surface work alone does not extract embedded oil.
Related guides
- Best bowling balls 2026 — expert picks across skill levels
- How to read bowling lane conditions — the foundation of ball selection
- Best bowling shoes 2026 — slide consistency starts with your shoes
- Bowling spare shooting guide — pick up the 7-pin, 10-pin, and tricky splits
- Bowling ball cleaning & maintenance — protect your investment
Get our honest 2-page checklist — coverstock, weight, lane oil, and the 5 mistakes that cost most bowlers money. One short email every couple of weeks. No spam.

Edited by Jeroen Kooij
Editor · ExpertBowler
Editor of ExpertBowler. Responsible for editorial standards and accuracy of bowling technique, equipment, and lane play guidance. Cross-references USBC coaching materials, pro shop instructor input, and verified league-bowler feedback. Read more about our editorial process.
Editorial standards: Technique advice cross-referenced with USBC coaching materials and pro shop instructor input. We do not accept paid placements.
Updated: 2026.
Sources & references
- USBC coaching materials: bronze, silver, gold-level coaching curricula for technique fundamentals
- Pro shop instructor input: aggregated pro shop input on common technique issues and corrections
- Community feedback: verified threads on BowlingForums.com and Reddit r/Bowling
- Published bowling instruction: Bowling This Month, Bowl.com instructional resources
- USBC equipment specifications: approval lists for league and tournament-grade equipment

Ok…my mental gears are turning. I am generally rolling a Hammer Black Widow 3.0 and a Black Widow 2.0 Hybrid during league play, “normal house shot”. After working a long time on my form and staying behind the ball, my revs and roll effectiveness have gone up seemingly a good amount. Both balls are now too aggressive through the night. Can “should” I resurface both, but increase “box” surface by 500? I.e. BW 3.0 is box at 500-1000-2000. I am thinking move to 1000-1500-3000. BW2.0H is 500-1000-1500-Polish…thought is 1000-1500-2500-Polish. Thoughts? THANKS
Great question, and the instinct is right — when your revs go up, your old surface starts reading the lane earlier than it used to, and both of those balls are already aggressive pieces to begin with. Bumping every grit step by ~500 will move you in the right direction, but I’d push back a little on the strategy.
The dominant factor in surface reaction is the final grit (and whether or not there’s polish on top of it). The intermediate steps mostly just get you to a clean, even finish before the last pad. So instead of resurfacing both balls in one go, I’d test the biggest lever first.
For the BW 3.0, going from box 2000 to a 3000 or even 4000 finish will give you a noticeable amount of length without changing the ball’s character. A lot of higher-rev players run the 3.0 at 4000 on medium house and it shapes up beautifully — earlier length, smoother midlane read, but still that HK22 backend pop. That’s a bigger change than the 500-grit bump and probably solves your “too aggressive through the night” problem on its own.
For the BW 2.0 Hybrid, your plan (1000-1500-2500-Polish) is reasonable, but honestly the polish is doing most of the work on that ball already. If it’s only overreacting late in the night, a fresh re-polish over the current surface might be all it needs — no full resurface required. Polish wears off faster than people realize, especially with higher revs.
Two more things worth flagging:
Change one ball at a time, bowl three sessions, then decide on the other. If you swap both at once and the look changes, you won’t know which adjustment did what.
If both balls feel like too much all night, the gap in your bag is probably a weaker piece for transition — a benchmark symmetric or a pearl — rather than a surface adjustment on what you already own. Surface tweaks buy you a few games; the right third ball solves it.
Hope that helps — let us know how it shapes up.
— Jeroen